
Article-At-A-Glance
- The right storage method can extend the life of fresh produce from days to months — sometimes even years.
- Not all produce belongs in the fridge — storing some items at room temperature actually keeps them fresher longer.
- Eight proven methods for preserving fresh produce at home, from freezing and fermenting to the surprisingly simple herb vase trick.
- Blanching before freezing is a game-changer for texture and nutrient retention — but it’s not always necessary.
- Starting with the freshest produce possible is the single most important step before using any preservation method.
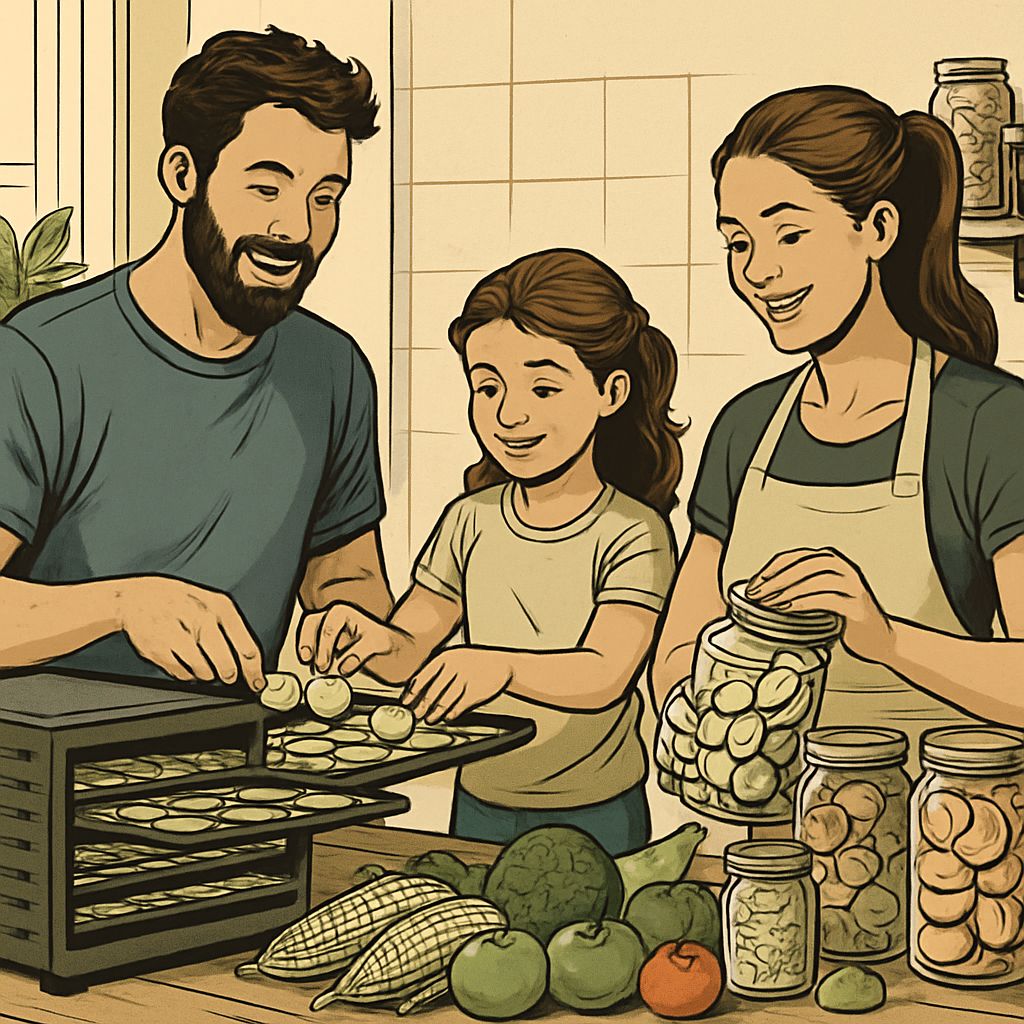
Most fresh produce doesn’t go bad because of bad luck — it goes bad because of bad storage.
Stop Throwing Away Fresh Produce
The average household throws away a significant amount of fresh produce every week. It wilts in the crisper drawer, turns mushy on the counter, or gets forgotten in the back of the fridge. The frustrating part? Most of that waste is completely preventable. With the right storage strategies, you can keep fruits and vegetables fresh for days, weeks, or even months longer than you’re used to.
Whether you grow your own food, shop at a farmers market, or rely on grocery delivery, knowing how to store fresh produce properly is one of the most practical sustainable living skills you can develop. It saves money, cuts down on food waste, and means you always have good ingredients on hand.
Why Fresh Produce Goes Bad Fast
Fruits and vegetables are still biologically active after harvest. They continue to respire, releasing carbon dioxide and moisture, which speeds up decay. Some produce also releases ethylene gas — a natural ripening agent — which can accelerate spoilage in nearby items. Apples, bananas, and tomatoes are among the biggest ethylene producers, which is why storing them next to delicate greens is a recipe for disappointment. For tips on how to protect your home and family, consider reading about wildfire preparedness.
How the Right Method Changes Everything
There’s no single best way to store all produce. The right method depends on the type of fruit or vegetable, how soon you plan to use it, and what you have available. A strawberry that’s two days from being eaten needs completely different treatment than a potato you’re storing for the winter. Once you understand the logic behind each method, making the right call becomes second nature.
Start With the Freshest Produce Possible
No storage method can reverse the clock on produce that’s already past its prime. Selecting the freshest fruits and vegetables at the point of purchase is the first — and arguably most important — step to getting the longest shelf life out of anything you bring home.
What to Look for When Buying Leafy Greens
Leafy greens should look alive — crisp, vibrant, and deeply colored. Avoid bunches with yellowing edges, slimy leaves, or any sign of wilting at the stem. With bagged greens, check the sell-by date but also look through the bag for any leaves that have already started breaking down, since one bad leaf can accelerate decay across the whole bag.
Pre-washed and pre-cut greens have a shorter window than whole, unwashed leaves. If longevity matters to you, buy whole heads of lettuce or loose bunches of spinach and kale whenever possible. They last significantly longer and give you more control over the washing and storage process.
How to Pick Root Vegetables, Squash, and Onions That Last
Root vegetables like carrots, parsnips, and beets should feel firm and heavy for their size. Soft spots, cracks, or shriveled skin are signs that moisture has already been lost — and that storage life is limited. For onions and garlic, look for tight, papery skin with no green sprouting from the top. Once garlic starts to sprout, it’s not ruined, but its flavor weakens and its shelf life shortens considerably. If you’re interested in learning more about the best crops for your garden, check out the best crops for a survival garden.
Winter squash — butternut, acorn, delicata — should have a hard, matte skin with no soft patches. A shiny skin on butternut squash can actually indicate it was harvested too early, which shortens storage life. When chosen correctly, whole winter squash stored in a cool, dry spot can last anywhere from one to six months without refrigeration. For more on maintaining a long shelf life, consider learning about preparedness psychology to ensure you’re ready for any situation.
As a general rule, produce with intact skin, firm flesh, and no visible damage will always outlast anything that’s already showing signs of stress at the store.
1. Dehydrating
Dehydrating removes moisture from produce, which is the primary driver of bacterial growth and decay. Done correctly, dehydrated fruits and vegetables can last anywhere from six months to a year when stored in airtight containers away from light and heat. You can use a dedicated food dehydrator like the Cosori Premium Food Dehydrator, or simply use your oven set to its lowest temperature — typically around 170°F — with the door slightly cracked.
Almost any fruit or vegetable can be dehydrated. Tomatoes, mushrooms, apples, mangoes, zucchini, and herbs all dehydrate well. Slice produce uniformly — around ¼ inch thick — so pieces dry at the same rate. Thicker slices trap moisture in the center, which can lead to mold even in what looks like a fully dried piece. For fruits with high sugar content like apricots or peaches, a light dip in lemon juice before drying helps prevent browning and preserves color.
2. Freezing
Freezing is the most accessible and versatile method for long-term produce storage, and it works for nearly every fruit and vegetable you can name. The key is doing it right — because freezing done poorly leads to freezer burn, mushy textures, and wasted effort.
Freeze at Peak Freshness, Not After
The biggest mistake people make is waiting until produce is on the edge of spoiling before freezing it. Freezing doesn’t improve produce — it locks in its current state. Freeze fruits and vegetables when they’re at their peak ripeness and quality, and that’s exactly what you’ll get when you thaw them. Overripe bananas are a common exception — peeled and frozen, they’re perfect for smoothies and baking even past their fresh-eating window.
How to Freeze Chopped Produce Without Clumping
To prevent chopped produce from freezing into a solid, unusable block, use the flash-freeze method. Spread cut pieces in a single layer on a parchment-lined baking sheet and freeze for one to two hours until solid. Once frozen, transfer to a zip-lock freezer bag or airtight container. This way, pieces stay separate and you can grab exactly what you need without thawing the whole batch.
Label everything with the date. Frozen produce doesn’t last forever, and without labels, it becomes impossible to track what needs to be used first. A simple piece of masking tape and a marker is all you need.
For best results, remove as much air as possible from freezer bags before sealing. Air is the enemy — it causes freezer burn, which dries out the surface of frozen food and dulls its flavor. A drinking straw works well for sucking out excess air before sealing the bag shut.
Raw vs. Blanched: Which Is Better for Freezing
This depends on the type of produce and how you plan to use it. Here’s a quick breakdown:
- Blanch before freezing: Green beans, broccoli, cauliflower, spinach, peas, asparagus, and most other vegetables. Blanching deactivates enzymes that cause loss of color, texture, and nutrients over time in the freezer.
- Freeze raw: Berries, bananas, mangoes, peaches, corn (cut from the cob), and peppers all freeze well without blanching and thaw with good texture.
- Avoid freezing raw: Lettuce, cucumbers, celery, and other high-water-content vegetables turn mushy and are better preserved through other methods.
Blanching is simple: boil the vegetable for two to four minutes depending on size, then immediately transfer to an ice bath to stop the cooking process. Drain thoroughly before freezing to avoid excess ice crystals forming on the surface.
3. Pickling
Pickling transforms fresh produce into something shelf-stable and genuinely delicious. The process works by submerging vegetables or fruits in an acidic solution — either vinegar-based or a natural brine — that creates an environment where harmful bacteria can’t survive. Properly sealed pickled produce stored in a cool, dark place can last up to one year.
The best part about pickling is how little equipment it requires. A clean mason jar, your chosen liquid, salt, and whatever spices you like is all you need to get started. Garlic, dill, peppercorns, mustard seeds, and red pepper flakes are classic additions that elevate the flavor well beyond a basic pickle.
Quick pickling — also called refrigerator pickling — skips the canning step entirely. You simply pour hot brine over your vegetables, let the jar cool, seal it, and refrigerate. These quick pickles are ready in as little as 24 hours and keep in the fridge for up to two months, making them ideal for anyone who wants results without committing to a full preservation project.
Vinegar vs. Brine: What’s the Difference
Vinegar pickling uses an acidic solution — typically white vinegar or apple cider vinegar diluted with water — to preserve the produce. The acidity drops the pH low enough to prevent bacterial growth, giving you a sharp, tangy flavor. Brine pickling, on the other hand, uses a saltwater solution that encourages the growth of beneficial lactobacillus bacteria. This is actually fermentation, not pickling in the traditional sense, and it produces a more complex, mildly sour flavor without the sharpness of vinegar. Classic dill pickles made the old-fashioned way are brine-fermented, not vinegar-pickled.
Best Vegetables to Pickle for Long-Term Storage
Dense, firm vegetables hold up best through the pickling process. Cucumbers are the obvious choice, but carrots, radishes, red onions, green beans, jalapeños, cauliflower, and beets all pickle exceptionally well. Avoid soft or leafy vegetables — they turn mushy quickly in acidic solutions and don’t offer a satisfying texture after pickling. For more on growing your own ingredients, consider exploring the best crops for a survival garden.
4. Fermenting
Fermentation is one of the oldest food preservation techniques in human history, and it’s having a well-deserved comeback. Unlike pickling with vinegar, fermentation relies entirely on naturally occurring bacteria — primarily lactobacillus — to convert the sugars in produce into lactic acid. That acid preserves the food and gives fermented vegetables their characteristic tangy depth. All you need is fresh produce, non-iodized salt, water, and a clean glass jar.
How Fermentation Differs From Pickling
The core difference comes down to biology. Vinegar pickling is a chemical process — you’re adding acid from an external source to lower the pH and prevent spoilage. Fermentation is a living process — you’re cultivating beneficial microorganisms that produce acid naturally over time. Fermented foods continue to develop in flavor as they age, while vinegar-pickled foods stay relatively consistent once made. Sauerkraut, kimchi, and naturally fermented kosher dill pickles are all fermented products, not pickled in the vinegar sense.
Why Fermented Foods Are Good for Gut Health
Because fermentation preserves the live cultures of beneficial bacteria, fermented foods deliver active probiotics to your digestive system. These probiotics support a balanced gut microbiome, which is linked to improved digestion, stronger immune function, and better overall health outcomes. Lacto-fermented vegetables like sauerkraut and kimchi retain most of their original vitamins and minerals — and in some cases, fermentation actually increases the bioavailability of certain nutrients compared to raw produce.
5. Canning
Canning creates an airtight, shelf-stable seal that can keep produce safe and edible for one to five years without refrigeration. There are two methods: water bath canning, which works for high-acid foods like tomatoes, fruits, and pickles, and pressure canning, which is required for low-acid vegetables like green beans, corn, and carrots. A pressure canner equipped with a vent, pressure gauge, and screw clamps reaches temperatures above boiling — around 240°F — which is necessary to eliminate the risk of botulism in low-acid foods. Water bath canning is beginner-friendly and requires nothing more than a large stockpot, mason jars with new lids, and a jar lifter. Pressure canning has a steeper learning curve but opens up a much wider range of produce for long-term storage.
6. Airtight Storage
For produce you plan to eat within the next week or two, airtight storage is your most practical tool. Airtight containers slow oxidation, limit moisture loss, and — critically — prevent ethylene-sensitive produce from being exposed to ethylene-producing neighbors. A strawberry stored in a sealed glass container lined with a paper towel can last nearly a week in the fridge, compared to just two or three days left loose in its original container.
The paper towel trick is worth emphasizing. Placing a dry paper towel inside any container holding washed produce absorbs excess moisture — the primary cause of sliminess and early decay in refrigerated fruits and vegetables. Replace the paper towel every couple of days and your produce stays fresh noticeably longer.
Which Produce Belongs in the Fridge vs. the Pantry
A lot of produce is stored in the wrong place, which actually shortens its life. Tomatoes lose flavor and develop a mealy texture when refrigerated — they should always be kept at room temperature until fully ripe. Potatoes, onions, and garlic all prefer cool, dry, dark conditions — a pantry or cellar — rather than the fridge. Bananas slow their ripening when refrigerated (the skin blackens, but the fruit stays firm), which can be useful once they reach your preferred ripeness. Citrus, apples, and most berries belong in the fridge. Herbs vary — more on that in the herb vase section below.
Best Containers for Airtight Produce Storage
Glass containers with locking lids — like the Pyrex Simply Store or OXO Good Grips glass containers — are the gold standard. They don’t absorb odors, don’t leach chemicals, and seal consistently well. For berries and cut fruit, the OXO Good Grips GreenSaver Produce Keeper goes a step further by including a carbon filter that absorbs ethylene gas, plus a raised basket that keeps produce off any pooled moisture at the bottom.
Reusable silicone bags like the Stasher Stand-Up Bag are an excellent sustainable alternative to single-use plastic zip-lock bags for storing chopped vegetables and prepped produce. They seal airtight, are dishwasher safe, and last for years — making them a smart investment for anyone trying to reduce plastic waste in the kitchen.
7. Preserves
Making preserves — jams, jellies, chutneys, compotes, and fruit sauces — is one of the most rewarding ways to extend the life of seasonal produce. A bushel of peaches that would otherwise go soft within a week can become a year’s worth of jam with a few hours of work. The cooking process concentrates flavors and, combined with sugar and natural preservatives, creates a product that keeps far longer than the original fruit.
Chutneys and savory compotes made from tomatoes, onions, stone fruits, or figs pair beautifully with cheeses and roasted meats, and they use produce that’s ripe to the point of being too soft to eat fresh. This is where preserves shine — they turn overripe into extraordinary.
How Sugar and Pectin Extend Shelf Life
Sugar works as a preservative by binding to the water molecules in fruit, making that water unavailable to the microorganisms that cause spoilage. The higher the sugar concentration, the more effective the preservation — which is why traditional jam recipes call for roughly equal parts fruit and sugar by weight. For more tips on preserving food, check out these budget-friendly preparedness purchases.
Pectin is a naturally occurring starch found in the cell walls of fruit, particularly in apples, citrus peel, and underripe fruit. When heated with sugar and an acid like lemon juice, pectin forms the gel-like structure that gives jam its set. Fruits low in natural pectin — like strawberries, peaches, and cherries — typically need added pectin to set properly. Products like Ball RealFruit Classic Pectin or Pomona’s Universal Pectin give you reliable results without having to guess at ratios.
Low-sugar and no-sugar preserves are possible using Pomona’s Universal Pectin, which activates with calcium rather than sugar. This gives you the option of making fruit preserves that are lower in sugar without sacrificing the set — a meaningful trade-off for anyone watching their sugar intake while still wanting to preserve seasonal fruit.
Jams, Chutneys, Compotes, and Sauces: What Works Best
Not all preserves are created equal, and choosing the right format for your produce makes a significant difference in both flavor and longevity. Jams work best with soft, high-moisture fruits like strawberries, blueberries, and plums. Chutneys — which combine fruit, vinegar, sugar, and spices — are ideal for tomatoes, mangoes, apples, and stone fruits that are too ripe to eat fresh but full of flavor. Compotes are loosely cooked fruit in syrup, meant to be consumed within a few weeks rather than shelf-stored. Fruit sauces like applesauce or pear butter can be canned for long-term storage or frozen in portions for use throughout the year.
The Nutritional Trade-Off With Preserves
Preserves: Nutritional Trade-Offs at a Glance
Jam & Jelly: High sugar content; most vitamin C lost during cooking; fiber partially retained in jams.
Chutney: Moderate sugar; vinegar adds acidity; some vitamins lost, but minerals largely retained.
Compote: Lower sugar than jam; shorter shelf life; retains more texture and some heat-sensitive nutrients.
Fruit Butter (e.g., apple butter): Slow-cooked; concentrated flavor; moderate sugar; vitamin loss similar to jam.
Fermented preserves (e.g., lacto-fermented fruit): No heat applied; probiotics present; excellent nutrient retention.
The honest trade-off with cooked preserves is that heat destroys some heat-sensitive nutrients — particularly vitamin C and certain B vitamins. The longer and hotter the cooking process, the greater the loss. That said, minerals like potassium and magnesium are largely unaffected by cooking, and the fiber content in fruit-based jams remains mostly intact. For those interested in preserving their own food, consider exploring the best crops for a survival garden to ensure a steady supply of fresh ingredients.
From a sustainability perspective, the trade-off is still worth making. A jar of homemade tomato chutney using tomatoes that would have otherwise been composted represents far less waste than the nutritional loss from cooking. Preserving imperfect, overripe, or surplus produce — rather than discarding it — is always the more sustainable choice, even if the nutritional profile shifts slightly in the process.
If nutrient retention is your top priority, fermented preserves and freezing are your best options since neither involves high heat. Dehydrating at low temperatures — below 115°F — also preserves more enzymes and heat-sensitive nutrients than conventional oven drying at higher temperatures. The Cosori Premium Food Dehydrator allows temperature settings as low as 95°F for this purpose.
8. Herb Vase Method
Fresh herbs are notoriously short-lived once you get them home, but the herb vase method solves this problem almost entirely. The concept is simple: treat cut herbs the same way you’d treat cut flowers. Place them upright in a glass or jar with an inch or two of water at the bottom, loosely cover the leaves with a plastic bag or reusable produce bag, and store in the fridge — or on the counter, depending on the herb. Done correctly, this method can keep fresh herbs alive and vibrant for two to three weeks instead of the two to three days you’d get from tossing them loose into the crisper drawer.
How to Store Herbs Upright in Water
Tender herbs — basil, cilantro, parsley, mint, and dill — respond best to the vase method. Trim the bottom of the stems at an angle, just as you would with flowers, to open up the stem and allow for better water absorption. Change the water every two days to prevent bacterial buildup, which is what turns the water cloudy and accelerates stem decay. Basil is the exception to refrigeration — it’s tropical in origin and goes black quickly when cold. Store basil on the counter in its vase of water, away from direct sunlight, and it will stay fresh and fragrant for up to two weeks at room temperature.
Hardy herbs like rosemary, thyme, sage, and oregano don’t need the vase method at all. Wrap them loosely in a lightly damp paper towel, place inside a reusable zip bag or airtight container, and refrigerate. They’ll stay fresh for two to three weeks with minimal attention. These herbs also dry beautifully — simply hang them upside down in small bundles in a warm, dry spot for a week, then crumble the dried leaves into an airtight jar for months of flavor.
Using Damp Paper Towels for Asparagus and Delicate Herbs
|
Produce |
Best Method |
Storage Location |
Expected Freshness |
|---|---|---|---|
|
Basil |
Herb vase, uncovered |
Counter (room temp) |
Up to 2 weeks |
|
Cilantro / Parsley |
Herb vase, loosely covered |
Refrigerator |
2–3 weeks |
|
Rosemary / Thyme / Sage |
Damp paper towel wrap |
Refrigerator |
2–3 weeks |
|
Asparagus |
Upright in water, tips covered with damp towel |
Refrigerator |
Up to 1 week |
|
Chives / Dill |
Damp paper towel, sealed bag |
Refrigerator |
1–2 weeks |
Asparagus benefits from a hybrid approach. Stand the spears upright in a jar with about an inch of water, then drape a lightly damp paper towel over the tips to keep them from drying out. Cover loosely with a reusable produce bag and refrigerate. This mimics the way asparagus grows and keeps the spears crisp and tightly closed for up to a week — far longer than leaving them horizontal in a bag.
For delicate fresh herbs like chives, tarragon, and dill that don’t stand up as easily in water, the damp paper towel method works well. Lay the herbs flat on a lightly moistened paper towel, roll them up gently, and place inside a sealed zip bag or airtight container in the fridge. The towel provides just enough humidity to prevent wilting without creating the excess moisture that causes sliminess. Check every two to three days and replace the towel if it becomes too wet.
Frequently Asked Questions
Fresh produce storage raises a lot of practical questions, especially once you start moving beyond the basics of just tossing things in the fridge. The answers below address the most common points of confusion to help you make confident decisions about preserving whatever you have on hand.
Keep in mind that food safety always comes first. When in doubt about whether a preserved food is still safe to eat, trust your senses — and when pressure canning low-acid vegetables, always follow tested recipes from trusted sources like the USDA Complete Guide to Home Canning or the National Center for Home Food Preservation.
What Is the Best Way to Preserve Fresh Vegetables at Home?
The best method depends on the vegetable and how long you need to store it. For most vegetables, freezing after blanching is the most reliable all-around method — it preserves color, texture, flavor, and nutrients effectively for up to twelve months. For longer storage without refrigeration, canning or dehydrating are the strongest options. For short-term freshness within one to two weeks, airtight container storage in the refrigerator is usually sufficient.
How Long Does Frozen Produce Last in the Freezer?
Most frozen fruits and vegetables maintain their best quality for eight to twelve months when stored at a consistent 0°F (-18°C). After that, they remain safe to eat indefinitely but may suffer in texture and flavor due to freezer burn and ice crystal formation. Always label your frozen produce with the date it was frozen so you can use older items first and avoid mystery bags sitting forgotten at the back of the freezer.
Can You Preserve Fruits and Vegetables Without Special Equipment?
Absolutely. Refrigerator pickling, the herb vase method, damp paper towel wrapping, and basic freezer storage all require nothing beyond what most kitchens already have. Even fermenting requires only a clean glass jar, non-iodized salt, and water. The methods that do require equipment — pressure canning, dehydrating — are worth the investment if you preserve large quantities regularly, but they’re entirely optional for most households.
Is Fermented Food the Same as Pickled Food?
No — though the terms are often used interchangeably, they refer to fundamentally different processes. Pickling uses an external acid, typically vinegar, to lower the pH and preserve food. Fermentation uses naturally occurring bacteria to produce lactic acid from within the food itself, through a living biological process.
The practical difference shows up in flavor, nutrition, and shelf life. Fermented foods have a more complex, evolving flavor profile and contain active live cultures — probiotics — that vinegar-pickled foods do not. However, vinegar pickling is faster, more predictable, and easier for beginners to control.
- Vinegar pickled: Ready in 24 hours; sharp, consistent flavor; no live cultures; refrigerator or shelf-stable when canned.
- Lacto-fermented: Takes three to fourteen days; complex, evolving flavor; contains live probiotic cultures; refrigerate after fermentation is complete.
- Both methods: Preserve vegetables effectively; extend shelf life significantly beyond raw storage.
If you’re new to preservation, start with refrigerator pickling for speed and simplicity, then try a small batch of lacto-fermented vegetables — like a basic sauerkraut or fermented carrot sticks — once you’re comfortable with the process.
Does Preserving Produce Affect Its Nutritional Value?
Yes, but the extent of the impact depends heavily on the method used. Heat-based methods like canning and making cooked preserves cause the most nutrient loss, particularly of heat-sensitive vitamins like vitamin C and folate. However, minerals and fiber are largely retained regardless of the preservation method.
Freezing is widely considered the best method for retaining nutritional value, particularly when produce is frozen quickly at peak ripeness. Studies cited by food science organizations consistently show that frozen vegetables can match or even exceed the nutritional content of fresh produce that has been sitting in transit or storage for several days before reaching the consumer.




Leave a Reply