
- Skills outlast gear — a knife can break, batteries die, and filters clog, but knowledge stays with you no matter what.
- Ten core outdoor skills — from fire-starting and navigation to emotional resilience — form the real foundation of wilderness preparedness.
- Beginners should start with fire and water — master those two first and every other skill builds naturally from there.
- Gear and skills work best as a team — the goal isn’t to ditch your pack, it’s to make sure you’re not helpless without it.
- One skill most people overlook could be the difference between a close call and a tragedy — keep reading to find out what it is.
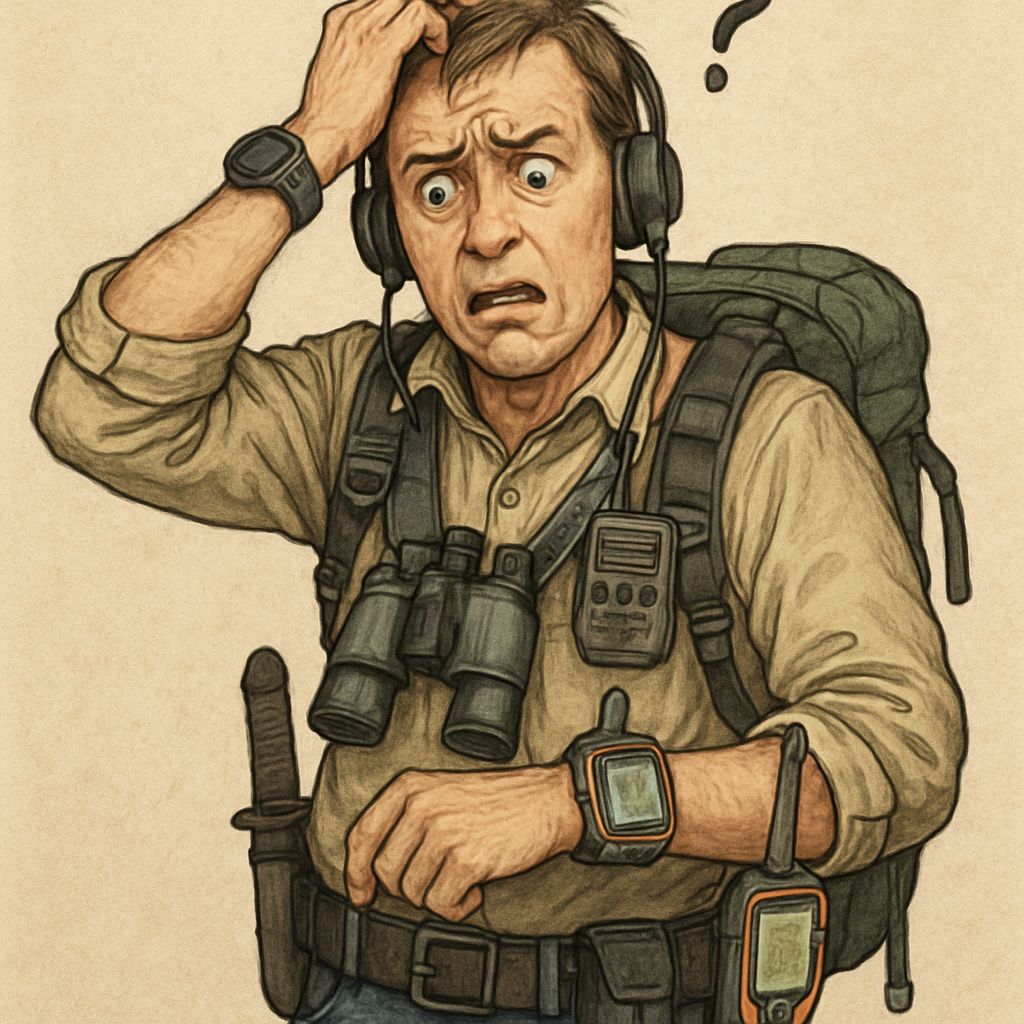
Gear can fail you at exactly the wrong moment — and the people who walk out of the wilderness alive are rarely the ones with the most expensive kit.
The outdoor preparedness space puts a lot of weight on what you carry. And yes, the right gear matters. But there’s a version of preparedness that no store can sell you: the kind that lives in your hands and your head.
Gear Breaks. Skills Don’t.
A water filter can freeze and crack. A GPS unit can lose signal or run out of battery. A firestarter can get wet, lost, or forgotten. Every single piece of gear you rely on has a failure mode. Skills don’t work that way. Once you know how to find water, read terrain, or start a fire with friction, that knowledge doesn’t expire or malfunction.
Why the Best-Equipped Person Isn’t Always the Best Prepared
There’s a pattern that shows up constantly in wilderness rescue reports — well-equipped hikers who panic when one piece of gear fails. A hiker with a $400 GPS unit who has never used a compass is in real trouble the moment that device dies. Someone who knows how to read a topo map and identify ridgelines from terrain features? They’re fine. Equipment gives you a head start. Skill is what carries you across the finish line.
The Real Cost of Over-Relying on Gear
Over-reliance on gear creates a false confidence that’s actually more dangerous than having nothing at all. When your tools work, you feel prepared. When they don’t, that illusion collapses fast — and without underlying skills, there’s nothing to fall back on. The real investment isn’t in your pack. It’s in what you can do when the pack is gone, such as understanding the basics of multitools.
1. Fire Starting Without a Lighter
Fire is warmth, water purification, signaling, morale, and cooking — all at once. It’s the most multi-purpose survival resource in the outdoors, which is exactly why knowing how to produce it without a modern ignition source is non-negotiable for any serious adventurer. For more on preparing for various situations, consider exploring the preparedness mindset for the modern world.
Friction-Based Methods: Bow Drill and Hand Drill
Friction fire is hard. That’s not a reason to avoid it — it’s a reason to practice it long before you need it. The two most reliable primitive methods are the bow drill and the hand drill, and they work on the same basic principle: spinning a wooden spindle against a fireboard fast enough to generate an ember.
- Bow Drill: Uses a looped cord on a bow to spin the spindle. More mechanical advantage, better for beginners or people with less upper body endurance.
- Hand Drill: Spun directly between your palms with a long, straight spindle. Harder to master, but requires no cordage — just two pieces of dry wood.
- Wood pairing matters: Soft on soft works best. Willow, cedar, basswood, and mullein are reliable combinations in North America.
- Moisture is the enemy: Even slightly damp wood dramatically reduces your chances of getting an ember. Learn to test wood dryness by feel and sound.
Once you have an ember, transfer it carefully into a pre-built tinder bundle — dried grass, shredded bark, or cattail fluff work well — and blow gently until it ignites into flame. This transition from ember to flame is where most beginners lose it. Practice it separately until it’s second nature.
Flint and Steel: The Reliable Fallback
A ferrocerium rod — commonly called a ferro rod — is arguably the most practical backup ignition tool you can carry. Strike it at a 45-degree angle with a hard steel edge and it throws sparks at around 3,000°F, which will ignite char cloth, dry tinder fungus, or fine dry grass almost instantly. Unlike a lighter, it works wet, works at altitude, and has no fuel to run out.
True flint and steel — actual flint rock struck against high-carbon steel — is a legitimate skill worth knowing, though it requires quality char cloth to catch the spark reliably. It’s slower and more situational than a ferro rod, but in a true gear-zero scenario, knowing it could matter.
How to Read Tinder, Kindling, and Fuel Wood
Fire building is a three-layer system, and collapsing those layers is the most common beginner mistake. Tinder catches the initial spark or ember — think shredded dry bark, fine grasses, or birch paper. Kindling sustains and grows the flame — pencil-thin to finger-thick dry sticks. Fuel wood locks in the fire and keeps it burning for the long haul. Rushing from tinder to fuel without building through kindling kills the fire every time.
2. Navigation Without GPS
Modern GPS is excellent — until it isn’t. Dead batteries, no signal, device failure, or simply being caught without your phone can strip you of digital navigation in seconds. Map and compass skills aren’t just a backup plan. For serious backcountry travel, they’re the primary plan, with GPS as the convenience layer on top.
How to Use a Map and Compass Together
A topographic map shows you what the terrain looks like in three dimensions — ridges, valleys, drainages, and elevation changes are all readable once you understand contour lines. Pair it with a baseplate compass like the Suunto A-10 or Silva Ranger, orient the map to north by aligning the compass needle with the map’s north arrow, and you can pinpoint your location and plot a bearing to any destination on the map. The skill of triangulation — taking bearings to two or more known landmarks and finding where those lines cross — is what separates competent navigators from people who are just guessing.
Natural Navigation: Sun, Stars, and Terrain
When you have no instruments at all, the landscape itself becomes your compass. In the Northern Hemisphere, the sun rises roughly east and sets roughly west — at solar noon, it sits due south. At night, Polaris (the North Star) sits almost directly above true north and can be found by following the outer edge of the Big Dipper’s cup upward five times its own length. Terrain features also tell a story: in the Northern Hemisphere, south-facing slopes are drier and more open, north-facing slopes hold more moisture and denser vegetation. These patterns won’t give you GPS precision, but they’ll keep you moving in the right direction. For additional ways to harness the sun, explore solar power solutions to ensure you’re prepared for any situation.
3. Water Sourcing and Purification
You can survive roughly three weeks without food. Without water, you’re looking at three days — less in heat, at altitude, or under physical exertion. Water sourcing and purification isn’t just a survival skill. It’s the survival skill, and it deserves more attention than most outdoor enthusiasts give it.
Finding water is only half the problem. Even crystal-clear mountain streams can carry Giardia lamblia, Cryptosporidium, bacteria, and viruses that will put you in serious medical trouble days after you drink. Every water source in a backcountry environment should be treated as contaminated until proven otherwise.
How to Locate Water in Different Environments
Water follows gravity, so moving downhill toward drainages and valleys is almost always your first move. In arid environments, look for green vegetation, animal tracks converging into a line, or dry riverbeds that may have subsurface water you can dig for. In forested environments, listen — moving water is often audible before it’s visible. Morning dew collected from vegetation with an absorbent cloth is a legitimate emergency water source when nothing else is available.
Boiling, Filtering, and Chemical Treatment Compared
Method
Effective Against
Limitations
Boiling
Bacteria, viruses, protozoa
Requires fire and container; doesn’t remove sediment
Filtration (e.g., Sawyer Squeeze)
Bacteria, protozoa
Most filters don’t remove viruses
Chemical (iodine/chlorine tabs)
Bacteria, viruses, some protozoa
Less effective against Cryptosporidium; taste
UV (SteriPen)
Bacteria, viruses, protozoa
Requires batteries; ineffective in turbid water
Building a Basic Improvised Filter
An improvised filter won’t sterilize water, but it will remove sediment and improve clarity before chemical treatment or boiling. Layer a container — a cut plastic bottle works perfectly — with alternating sections of grass or cloth at the base, then fine sand, then crushed charcoal from a fire, then coarser gravel at the top. Pour turbid water through from the top and collect the output. Always follow this with boiling or chemical treatment. The filter handles particulates; heat or chemicals handle pathogens.
Charcoal from a hardwood fire is particularly effective at absorbing certain chemicals and improving taste. It’s not the same as commercial activated charcoal, but in the field, it makes a meaningful difference in water quality and palatability.
4. Shelter Building From Natural Materials
Exposure kills faster than almost anything else in the wilderness. Hypothermia can set in within hours in wet and windy conditions, even when temperatures are well above freezing. Knowing how to build a shelter from what’s around you — without a tent, tarp, or sleeping bag — is what stands between you and a life-threatening situation when your gear is lost, wet, or simply not enough.
The goal of any emergency shelter isn’t comfort. It’s insulation from wind, rain, and ground cold. The ground pulls heat from your body far faster than cold air does, so getting off the earth and surrounding yourself with insulating material is the immediate priority. Natural materials like dry leaves, pine needles, bracken fern, and bark are surprisingly effective insulators when used in sufficient volume.
The Debris Hut: Best Single-Night Emergency Shelter
The debris hut is the gold standard of primitive shelter because it requires no tools, no cordage, and no prior construction experience — just time and energy. Start with a ridgepole about nine feet long, propped at one end on a forked stick roughly waist height and resting on the ground at the other. Lean branches along both sides to form a ribbed frame, then pile debris — leaves, pine needles, grass — over the entire structure at least two feet thick. That thickness is critical. Inside, fill the sleeping cavity completely with dry leaves for ground insulation. A well-built debris hut can retain body heat through a freezing night with no sleeping bag at all.
How to Choose the Right Shelter Location
Location makes or breaks a shelter before you’ve gathered a single stick. Avoid valley floors and creek beds where cold air pools overnight and flood risk increases. Look for natural windbreaks — a large fallen log, a rock outcropping, or a dense stand of conifers on the windward side. A slight slope is actually helpful for drainage, but you want to sleep across the slope, not down it.
Also look up before you commit to a spot. Dead branches — called widow makers — can fall with no warning in wind or rain. A spot that looks perfect at ground level can be directly under a 40-pound dead limb. Take thirty seconds to scan the canopy. It’s one of those habits that takes no time to build and could absolutely save your life.
5. Foraging for Wild Edibles
Foraging is one of those skills that feels almost romantic until you get it wrong — and getting it wrong can be fatal. The wilderness contains an abundance of edible plants, but it also contains some of the most toxic substances found in nature, and the margin between edible and deadly lookalikes is razor-thin in certain species. Approach foraging with genuine respect for the learning curve it demands.
That said, a working knowledge of even a dozen reliably identifiable wild edibles dramatically improves your self-sufficiency in the field. Caloric needs drop in survival mode when activity is reduced, but morale and physical energy both benefit enormously from even small amounts of foraged food. The goal is a conservative, well-practiced knowledge base — not adventurous experimentation with unknown plants. For those interested in expanding their understanding, you might find this guide to medicinal plants and herbs particularly useful.
The Universal Edibility Test
When you encounter an unknown plant and have no other food options, the Universal Edibility Test — developed and taught widely in military survival training — gives you a systematic way to assess risk. Separate the plant into its components: leaves, stems, roots, and fruit. Test only one part at a time. Crush a small amount and hold it against your inner wrist for 15 minutes, checking for burning, itching, or rash. If no reaction occurs, touch a small amount to your lips, then the tip of your tongue, then chew a small piece without swallowing and wait another 15 minutes. Only then swallow a small amount and wait eight hours before eating more. It’s slow, but it’s methodical — and it has kept people alive.
Most Reliably Safe Plants to Learn First
Some wild edibles are forgiving to identify because they have few dangerous lookalikes and grow abundantly across North America and Europe. These are the ones worth mastering first:
- Cattail (Typha spp.): Found near water, virtually every part is edible at different times of year — pollen in spring, green flower heads in early summer, starchy roots year-round.
- Dandelion (Taraxacum officinale): Leaves, flowers, and roots are all edible. One of the most recognizable and widespread plants in temperate regions.
- Blackberries and raspberries (Rubus spp.): Aggregate berries on thorny canes — no truly dangerous lookalikes in North America.
- Wood sorrel (Oxalis spp.): Heart-shaped leaflets in groups of three, tart lemon flavor. Widespread across forests and disturbed ground.
- Pine inner bark and needles (Pinus spp.): Inner bark is calorie-dense and can be eaten raw or dried; pine needle tea provides a meaningful vitamin C source.
What to Avoid: Dangerous Lookalikes
Water hemlock (Cicuta spp.) is considered by many toxicologists to be the most violently toxic plant in North America, and it looks strikingly similar to edible plants in the carrot family. Pokeweed, deadly nightshade, and white baneberry are other high-risk plants that appear benign or even appetizing. A foundational rule: avoid any plant with white or yellow berries, milky sap, an almond scent in the leaves or bark, a bitter or burning taste, or a three-leaflet pattern in regions where poison ivy is present. When in doubt, leave it alone.
6. First Aid and Wound Care
Wilderness first aid is a skill set that most people acknowledge they should have and far fewer people actually develop. In a backcountry emergency, help can be hours or days away, which fundamentally changes what first aid means. You’re not just stabilizing someone until the ambulance arrives — you may be managing an injury across an extended evacuation or overnight stay.
The basics matter most: controlling bleeding, managing shock, treating hypothermia, and preventing infection. These four areas cover the overwhelming majority of life-threatening wilderness medical emergencies. Start there before worrying about advanced techniques.
Controlling Bleeding With and Without a Tourniquet
Direct pressure is always the first intervention for bleeding — firm, continuous pressure held for a full ten minutes without peeking. Most wounds that appear severe will respond to direct pressure alone. For extremity wounds that don’t stop with pressure, a tourniquet is the correct next step. A commercial CAT (Combat Application Tourniquet) or SOFTT-W applied two to three inches above the wound, tightened until bleeding stops, and the time of application written on the casualty’s skin is the standard protocol. For more on preparedness, consider exploring the preparedness mindset for the modern world.
Without a commercial tourniquet, improvise with a strip of fabric at least two inches wide — narrower improvised tourniquets cause tissue damage without reliably stopping arterial bleeding. A windlass stick twisted into a loop of fabric can generate enough pressure to control limb hemorrhage as a last resort. Practice this before you need it. An improvised tourniquet applied incorrectly under stress is worse than none at all. For more on being prepared for emergencies, check out lessons from natural disasters.
How to Treat Hypothermia in the Field
Hypothermia sets in when core body temperature drops below 95°F (35°C), and it progresses faster than most people expect — especially when wet, exhausted, or at altitude. The first signs are uncontrolled shivering, slurred speech, and impaired coordination. At this stage, the treatment is straightforward: get the person out of wet clothing, insulate them from the ground and wind, and add external heat sources if available. Skin-to-skin contact inside an insulated sleeping bag is one of the most effective field treatments for mild to moderate hypothermia. Warm, sweet fluids help if the person is conscious and can swallow safely.
Improvised Splints and Wound Closure
A suspected fracture in the backcountry needs to be immobilized before any movement. Rigid splints can be improvised from sticks, trekking poles, sleeping pad sections, or any firm flat material padded with clothing to protect the skin. The splint should extend beyond the joints above and below the injury and be secured with strips of fabric, bandanas, or cut clothing — snug but not tight enough to restrict circulation.
Injury
Improvised Solution
Key Caution
Fracture
Stick/trekking pole splint padded with clothing
Check circulation distal to splint every 30 min
Deep laceration
Butterfly strips, duct tape closures, or wound staples
Never close a puncture wound or animal bite
Sprain
Compression wrap with elastic bandage or torn fabric
RICE protocol — Rest, Ice, Compress, Elevate
Shoulder dislocation
Sling from bandana or clothing to immobilize
Do not attempt relocation without training
For wound closure, deep lacerations that gape open can be drawn together with improvised butterfly strips made from duct tape or medical tape cut into an hourglass shape. Pull the wound edges together — don’t overlap them — and apply strips perpendicular to the cut. Cover with the cleanest material available and change the dressing daily, watching carefully for signs of infection: increasing redness, warmth, swelling, pus, or red streaking moving away from the wound.
Wound cleaning is the single most important step in preventing field infection. Irrigate aggressively with clean water — ideally using a syringe or improvised nozzle to generate enough pressure to flush debris from the wound bed. Studies in wilderness medicine consistently show that high-pressure irrigation significantly reduces infection rates compared to gentle rinsing alone.
Keep the wound moist if possible. Dry wounds heal more slowly and are more prone to cracking and re-opening during activity. A thin layer of petroleum jelly or antibiotic ointment from your kit, if available, makes a genuine difference over a multi-day evacuation.
7. Knot Tying
Knot tying is one of those skills that sounds simple until you’re trying to tie one in the dark, in the rain, with cold hands, under pressure. The mechanics of a good knot are precise, and muscle memory only comes from repetition. The good news is that you don’t need to know dozens of knots — you need to know a handful exceptionally well. For additional preparedness, you might also consider lessons from natural disasters to enhance your readiness skills.
Knots serve shelter building, first aid, load securing, gear repair, rappelling, and animal snaring. A knot that slips or fails under load in a critical situation is worse than no knot at all because it creates false security. Learn each knot slowly, then practice it until you can tie it correctly without looking.
The 5 Knots That Cover Almost Every Survival Situation
Knot
Best Use
Key Property
Bowline
Creating a fixed loop at the end of a rope
Won’t slip or tighten under load; easy to untie
Clove Hitch
Attaching rope to a pole or tree quickly
Fast to tie; adjustable; starting knot for lashings
Square Knot
Joining two rope ends; bandage ties
Flat, stable; not reliable for heavy loads alone
Prusik Hitch
Ascending a rope; load-releasing hitch
Grips under load; slides when unweighted
Truckers Hitch
Tensioning a ridgeline or securing a load
Creates a 3:1 mechanical advantage for tight lines
The bowline is often called the king of knots for good reason — it creates a secure, non-slipping loop that can be tied one-handed with practice, holds enormous load, and releases easily even after being heavily weighted. Every outdoor enthusiast should be able to tie a bowline behind their back, in the dark, in under ten seconds. That’s not hyperbole — that’s the standard to train toward.
The trucker’s hitch deserves special mention for shelter building specifically. A tight ridgeline for a tarp shelter requires real tension, and the 3:1 mechanical advantage built into a properly tied trucker’s hitch lets you generate that tension with paracord and hand strength alone — no hardware required. For more on preparedness, check out the preparedness mindset for the modern world.
8. Hunting, Trapping, and Fishing Basics
Food procurement is lower on the survival priority list than most people expect — you can function for weeks without calories — but in a prolonged wilderness situation, the psychological and physical benefit of protein and fat is enormous. Knowing how to extract food from your environment without carrying it in is a skill that separates short-term survivors from long-term ones. Additionally, learning about medicinal plants and herbs can further enhance your survival skills by providing natural remedies in the wild.
Active hunting is energy-intensive and largely impractical without firearms or significant skill with a bow. For most survival scenarios, passive food procurement — trapping and improvised fishing — delivers far better caloric return on energy investment. Set your traps, then move on to other tasks. Let the wilderness work for you while you sleep.
How to Set a Basic Snare
A fixed-loop snare positioned on an active game trail is the most fundamental trapping technique in wilderness survival. Use wire, paracord inner strands, or natural cordage twisted from plant fiber. The loop should be approximately the diameter of your fist for rabbits and squirrels — the most abundant and accessible small game across most of North America. Position the bottom of the loop four to six inches above the ground, supported by a small twig or notched stick, directly in the narrowest point of a trail where an animal’s head will naturally pass through it.
Numbers matter more than perfection with snares. Set ten to twenty snares across an area and check them every few hours. One well-placed snare is far less effective than a dozen mediocre ones spread across multiple active trails. Read the signs — droppings, tracks, chewed vegetation — to identify the highest-traffic corridors before committing to locations.
Improvised Fishing Methods When You Have No Rod
A gill net strung across a narrow section of stream — even one made from paracord inner strands tied into a grid with two-inch openings — will passively catch fish while you sleep or tend to other tasks. Anchor it to sticks driven into both banks, weight the bottom with stones, and float the top with small pieces of bark or wood. Check it every few hours. In a productive waterway, this method dramatically outperforms any amount of time spent holding a line. For more preparedness tips, explore our decision-making frameworks for preparedness.
Without any cordage at all, look for natural fishhooks in your environment — a small piece of bone, a thorn, or a bent safety pin from a clothing item. Bait with insects, worms found under rotting logs, or small pieces of bright material that mimic movement. A hand line — just a length of cordage tied directly to a hook with a small weight above it — is functionally identical to a rod and reel in terms of catch rate. The rod is a convenience. The hook, line, and bait are what actually matter. For more on preparedness essentials, check out this guide on multitools for home safety.
9. Situational Awareness and Threat Assessment
Most outdoor emergencies don’t announce themselves. They build quietly — a weather system that looked manageable an hour ago, a trail that’s been subtly wrong for the last mile, a group member who’s been moving slower and slower and not saying anything. Situational awareness is the skill of noticing what’s actually happening around you before it becomes a crisis that demands a reaction.
How to Scan Your Environment Like a Professional
Zone
What to Assess
How Often
Sky & Weather
Cloud type, wind direction changes, temperature drops, lightning risk
Every 30 minutes on exposed terrain
Terrain
Trail conditions, slope angle, drainage patterns, rockfall zones
Continuously while moving
Group
Pace, body language, hydration, morale, signs of fatigue or confusion
Every hour minimum; at every rest stop
Wildlife
Tracks, scat, disturbed vegetation, sudden silence in bird activity
Continuously; heightened at dawn and dusk
Navigation
Landmarks, bearing confirmation, time vs. distance progress
Every major terrain feature or junction
The military uses a concept called SALUTE (Size, Activity, Location, Unit, Time, Equipment) for threat reporting, but the underlying habit it builds — systematic, deliberate environmental scanning — is directly applicable to wilderness navigation and group safety. Train yourself to do a full environmental scan every thirty minutes on the trail, not just when something feels off. By the time something feels off, you’ve already lost time.
Weather reading is one of the most immediately practical subsets of situational awareness for outdoor enthusiasts. Cumulonimbus clouds building rapidly to the west, a sudden drop in wind followed by stillness, or a ring around the sun or moon (caused by ice crystals in high cirrus clouds) are all reliable early indicators of incoming weather. The standard alpine rule — be off exposed ridges and summits by noon during summer thunderstorm season — exists precisely because experienced mountaineers understand how fast conditions can change once development begins.
Bird behavior is an underrated environmental signal that experienced trackers and hunters leverage constantly. A sudden cessation of bird calls in a forest almost always indicates a predator — which in North America could mean a bear, mountain lion, or coyote moving nearby. Conversely, alarm calls from jays, crows, or squirrels in a specific direction give you both a warning and a location vector. These are free, real-time data points that most hikers walk right past without noticing.
Recognizing Danger Before It Becomes a Crisis
The concept of the accident chain — a term used widely in wilderness medicine and aviation safety — describes how most serious incidents result not from a single catastrophic event, but from a sequence of small, individually manageable decisions that compound into disaster. A late start, a navigational shortcut, skipping a rest break, ignoring early signs of fatigue — any one of these alone is survivable. Together, they stack into an emergency. Recognizing where you are in that chain, and breaking it deliberately, is the most powerful safety skill you can develop.
Breaking the accident chain requires a willingness to make unpopular decisions — turning back when the summit is visible, stopping to address a hot spot before it becomes a blister that changes your gait, insisting on a rest and calorie intake when the group wants to push on. The person who calls those stops consistently is not being cautious to the point of weakness. They are demonstrating exactly the kind of leadership that keeps groups in check and out of rescue reports.
10. Emotional Resilience Under Pressure
Every other skill on this list can be undermined by one thing: panic. The physical and cognitive cascade that follows a genuine survival emergency — elevated heart rate, tunnel vision, impaired decision-making, freezing — is a documented physiological response, not a character flaw. But it can be trained against, and the people who survive extreme situations consistently describe a mental discipline that kicks in where raw fear would otherwise take over.
Why Most Survival Failures Are Mental, Not Physical
Survival instructors and wilderness search and rescue professionals consistently report the same finding: the people who die in survivable situations almost always had the physical resources to make it out. What they lacked was the psychological framework to use those resources under stress. Panic burns energy, causes movement without direction, and overrides the rational thought processes that skills depend on. A person who can slow their breathing, assess the situation, and make one deliberate decision at a time — even a modest one — is operating at an exponentially higher survival level than someone with better gear who is overwhelmed by fear.
The STOP protocol — Stop, Think, Observe, Plan — is one of the most widely taught mental frameworks in survival training for exactly this reason. When you feel the first spike of panic, the instruction is deceptively simple: stop moving. Sit down if you can. The act of physically stopping breaks the panic cycle long enough for rational thought to reassert itself. From there, the sequence of thinking, observing your actual situation, and making a specific plan gives you forward momentum that is controlled rather than reactive. For more insights on preparedness, consider exploring lessons from natural disasters on fitness readiness.
Breathing and Focus Techniques That Work Under Stress
Box breathing — inhale for four counts, hold for four counts, exhale for four counts, hold for four counts — is used by U.S. Navy SEALs, emergency room physicians, and high-altitude mountaineers to lower heart rate and restore cognitive function under acute stress. It works because the extended exhale activates the parasympathetic nervous system, directly counteracting the adrenaline-driven fight-or-flight response. Four complete cycles take under two minutes and produce measurable physiological changes. It costs nothing, requires no gear, and works in any environment. Practice it at home until it’s automatic, so that reaching for it under stress is a trained reflex rather than a conscious effort.
Skills and Gear Work Best Together
The argument here was never that gear is useless — it’s that gear without skill is a liability, and skill without decent gear is unnecessary suffering. The ideal position is both: a well-curated kit that you know how to use completely, backed by deep enough skill that you remain functional if any part of that kit fails. A Sawyer Squeeze water filter is excellent. Knowing how to boil water and build an improvised filter means you’re covered when the Squeeze freezes solid on a winter trip. A GPS unit is invaluable on complex terrain. Knowing how to navigate by map, compass, and stars means a dead battery is an inconvenience rather than a crisis.
Invest in skills the way you invest in gear — deliberately, progressively, and with regular use. Take a Wilderness First Responder course. Practice friction fire in your backyard until you can reliably get an ember. Navigate a familiar trail without your phone. These aren’t dramatic gestures — they’re the accumulated competence that makes the difference when conditions stop being comfortable.
Frequently Asked Questions
These are the questions that come up most consistently from people who are serious about getting genuinely prepared rather than just gear-curious. The answers aren’t complicated, but they do require honesty about where most people actually are in their skill development versus where they think they are.
Survival skill confidence tends to be overestimated across the board. Studies in human performance consistently show that people rate their own competency in infrequently practiced skills significantly higher than their actual performance under testing conditions — a phenomenon sometimes called the Dunning-Kruger effect in applied contexts. The practical implication for outdoor preparedness is straightforward: assume your skills are less sharp than you think, and practice more than feels necessary.
The good news is that building genuine competency in any single skill takes far less time than most people assume — it’s the breadth of skills that requires sustained commitment. A focused weekend of practice with a quality instructor can take you from zero to functional competency in fire starting, basic navigation, or shelter building. Mastery takes years. But functional competency — enough to keep you alive and moving — is more accessible than most people realize.
Which survival skill should an absolute beginner learn first?
Start with fire. It addresses more survival priorities simultaneously than any other single skill — warmth, water purification, signaling, morale, and cooking — and the fundamentals are learnable in a single dedicated practice session. Once you can reliably start a fire with a ferro rod and a variety of tinder types, move to water sourcing and purification. Those two skills together cover the two fastest-acting wilderness threats: exposure and dehydration.
Can survival skills replace gear entirely in an emergency?
In theory, yes — people have survived extended wilderness emergencies with zero manufactured gear using only primitive skills. In practice, that’s an extremely high bar that requires years of dedicated training and experience. The realistic answer is that skills dramatically reduce your dependence on any single piece of gear and provide meaningful capability when gear fails — which is a far more likely scenario than total gear loss.
The smarter framing isn’t skills vs. gear but skills as insurance on gear. Carry the best kit you reasonably can, know how to use every item in it completely, and develop the skills to improvise when those items aren’t available or aren’t working. That combination puts you in the top tier of preparedness for almost any scenario you’re likely to face in the backcountry.
How long does it take to become confident in basic survival skills?
Functional competency in most individual skills — enough to execute them correctly under moderate stress — takes between one and three dedicated practice sessions with quality instruction or guided self-teaching. The challenge isn’t learning the mechanics. It’s the transition from knowing how something works to being able to do it automatically when cold, tired, hungry, and under pressure.
The only path to that second level is repeated practice under increasingly realistic conditions. That means practicing fire starting with wet hands in cold weather, not just in your backyard on a dry afternoon. It means navigating new terrain without a phone rather than just understanding how a compass works conceptually. Progressive stress inoculation — gradually increasing the difficulty of practice conditions — is what actually builds reliable field competency.
Are these skills relevant outside of wilderness survival?
Absolutely. First aid, situational awareness, emotional resilience under pressure, navigation, and water sourcing are directly applicable to urban emergencies, natural disasters, power outages, and vehicle breakdowns in remote areas. The wilderness survival framing is a useful learning context because it strips away modern conveniences and forces genuine problem-solving — but the skills themselves transfer directly to a much wider range of real-world scenarios than most people initially consider.
What is the single most common mistake people make when preparing for emergencies?
Buying gear instead of building skills. It’s the most consistent pattern in the preparedness space, and it’s understandable — gear is tangible, immediate, and satisfying to acquire. Skills require time, practice, discomfort, and often the humbling experience of being bad at something before you get good at it. That friction is exactly why most people default to purchasing another piece of kit instead. For those looking to develop a more resilient approach, exploring decision-making frameworks for preparedness might be a valuable step.
The second most common mistake is practicing skills only in ideal conditions. A person who can start a fire with a ferro rod on a dry summer afternoon but has never tried in rain, wind, or with cold hands doesn’t actually know if they can start a fire when they need to. Conditions in the field are almost never ideal, and your practice conditions should reflect that reality.
Third — and perhaps most overlooked — is neglecting the mental side of preparedness entirely. Physical skills and quality gear are both rendered significantly less effective by panic and poor decision-making under stress. Practicing the STOP protocol, box breathing, and deliberate decision-making in low-stakes stressful situations — hard workouts, cold water exposure, time-pressured problem-solving — builds the neural pathways that make those tools available when the situation is genuinely serious.



Leave a Reply