
Article-At-A-Glance
- Collecting rainwater at home is legal in most U.S. states, simple to set up, and can save thousands of gallons of municipal water every year.
- A basic rain barrel setup costs as little as $30 to $100 and can be operational in a single afternoon.
- Rainwater is naturally soft and chlorine-free, making it better for your garden than tap water in most cases.
- You can scale from a single 55-gallon barrel all the way up to a 275-gallon IBC tote system depending on your needs and goals.
- Find out exactly how much rainwater your roof can realistically collect — the numbers might surprise you.
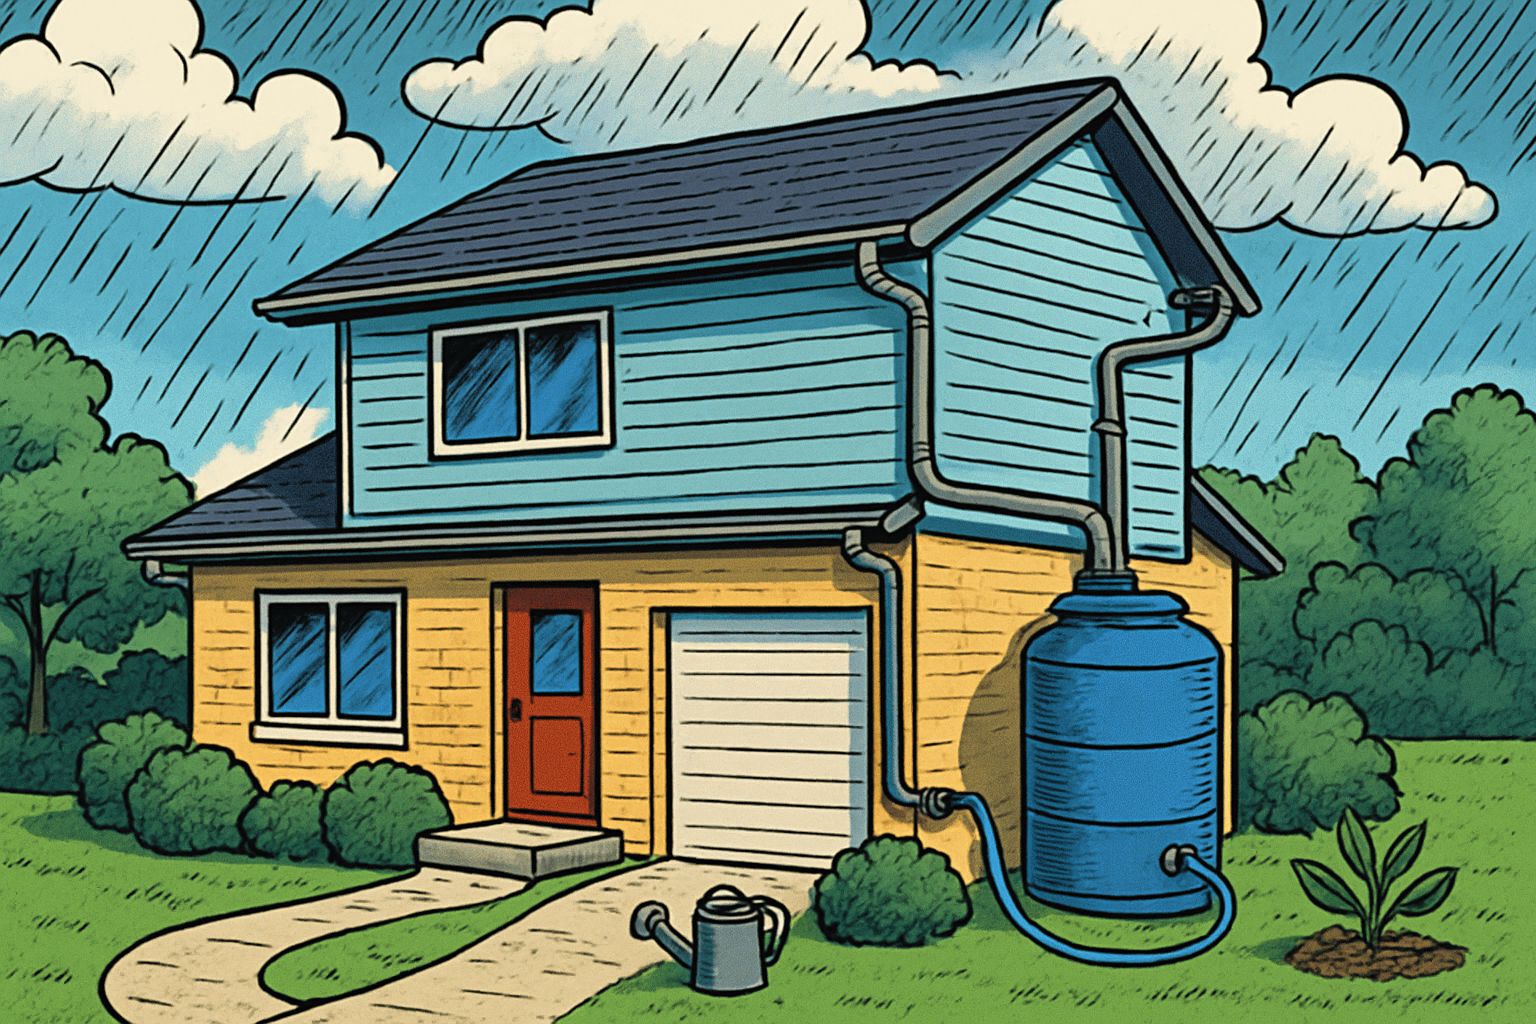
Collecting rainwater is one of the simplest, most impactful things you can do to live more sustainably — and most people already have everything they need to start.
The idea of harvesting rainwater sounds technical, but it really isn’t. Whether you place a bucket under a roof drip line or connect a 55-gallon barrel to your downspout, you’re tapping into a free, renewable resource that falls right onto your property. Rainwater harvesting is simple, safe, affordable, and a human right. That framing matters, because too many people have been put off by myths about complexity or legality that simply don’t hold up.
This guide will walk you through everything — from how collection actually works, to setup steps, to the best ways to put that water to use around your home.
Rainwater Is Free, Clean Enough, and Easier to Collect Than You Think
There’s a version of rainwater harvesting that requires engineering and permits. And then there’s the version most people need: a barrel, a diverter, and an afternoon. Rainwater that falls directly from the sky is remarkably clean. It hasn’t touched soil, pipes, or treatment chemicals. The main contamination concerns come from the surfaces it contacts after it falls — your roof, gutters, and storage container — which is why the setup details matter, but the concept itself is straightforward. To ensure your system is ready, consider learning about storm readiness and how to prepare for severe weather.
For garden irrigation, outdoor cleaning, and non-potable household uses, collected rainwater works beautifully without any treatment at all. For drinking, it needs proper filtration — something like a Berkey gravity filter handles this well — but that’s a layer you add when you’re ready, not a barrier to getting started.
How Rainwater Collection Actually Works
The Basic Flow: Rain falls on your roof → runs into gutters → travels down the downspout → diverted into a storage barrel or tank → dispensed through a spigot or hose for use.
That’s it. The system works entirely on gravity. No pumps required for a basic setup. Rain hits an impervious surface (your roof), gravity pulls it into your gutters, and a simple diverter redirects it into storage instead of letting it drain into the ground or a storm drain.
Larger systems add filtration stages, first-flush diverters (which discard the first dirty rush of water from a roof), and pressurized delivery. But the core principle never changes. Collect, store, use.
What Happens to Rain Before It Reaches Your Barrel
When rain hits your roof, it picks up whatever is sitting on that surface — dust, bird droppings, pollen, and small debris. The first few minutes of rainfall, called the “first flush,” carry the highest concentration of contaminants. A first-flush diverter automatically discards this initial flow and then redirects the cleaner water that follows into your storage barrel. For garden use, many people skip this device entirely and still get excellent results.
The Role Your Roof and Gutters Play
Your roof is essentially a giant collection surface. The larger the roof, the more water you capture per inch of rainfall. Metal roofs and tile roofs are the cleanest collection surfaces. Asphalt shingles are the most common and work fine for non-potable uses, though they can leach trace chemicals over time. Gutters channel all of that runoff into a single exit point — the downspout — which is exactly where your collection system connects.
No gutters? No problem. The simplest approach is to place containers directly under the drip line of your roof edge. Five-gallon buckets, clean garbage cans, or plastic totes all work. You won’t capture as much water, but you’ll capture something — and that’s always worth doing.
Why Rainwater Is Naturally Soft and Chemical-Free
Municipal tap water is treated with chlorine and chloramines, and depending on your region, it may carry high levels of dissolved minerals that leave white residue on soil and plants. Rainwater has none of that. It’s naturally soft, slightly acidic (which most garden plants prefer), and free from the sodium that softened water systems introduce. Plants genuinely thrive on it — you’ll often notice greener, more vigorous growth within weeks of switching your garden to harvested rainwater.
The Equipment You Need to Get Started
You don’t need much. A functional rainwater harvesting setup at its most basic is just a container with a lid and a way to connect it to your downspout. Everything else — diverters, screens, spigots, overflow valves — makes the system more efficient and easier to use, but none of it is required to start collecting today.
Rain Barrels vs. Large Storage Tanks: Which One Is Right for You
A standard rain barrel holds 50 to 80 gallons and costs anywhere from $30 for a repurposed food-grade barrel to $120 for a purpose-built option like the Step2 Fernway Rain Barrel. These are ideal for most homeowners who want to water a garden or fill watering cans. If you want serious storage capacity — think off-grid living or irrigating a large property — a 275-gallon IBC (Intermediate Bulk Container) tote is the most cost-effective upgrade. Used IBC totes run $100 to $200 and hold five times the water of a standard barrel.
Downspout Diverters and How They Work
A downspout diverter is a small device that installs directly into your existing downspout. It redirects water flow into your barrel when the barrel isn’t full, then automatically sends overflow back down the downspout once the barrel reaches capacity. Most diverters include a built-in screen to catch debris. Installation takes about 20 minutes with basic tools — usually just a hacksaw and a screwdriver.
Screens, Filters, and Overflow Valves You Should Not Skip
A fine mesh screen over the barrel inlet keeps out mosquitoes, leaves, and insects. This is non-negotiable. Mosquitoes can breed in standing water in as little as 72 hours, so a properly sealed barrel with a screened inlet prevents that entirely. An overflow valve or hose directs excess water away from your foundation when the barrel is full — without one, you risk water pooling against your house. These are small details that make a big practical difference.
How to Set Up a Rain Barrel at Home
Setting up a rain barrel is a genuine afternoon project. Here’s the step-by-step process used in a typical suburban home setup.
1. Pick the Right Location Near Your Downspout
Choose a downspout that handles a large section of your roof and sits close to where you’ll use the water most — near a garden bed, vegetable patch, or hose connection point. The barrel needs to sit on a stable, level surface directly beside or beneath the downspout. Proximity to your end use reduces how far you’ll carry or hose the water.
2. Elevate the Barrel for Better Water Pressure
Gravity is your water pressure system. The higher your barrel sits off the ground, the stronger the flow from the spigot. Even raising the barrel 12 to 18 inches on a cinder block platform or purpose-built stand makes a noticeable difference when filling watering cans or connecting a soaker hose. A barrel elevated 24 inches produces roughly 0.87 PSI of pressure — not enough for a sprinkler, but perfectly adequate for drip irrigation and hand watering.
3. Connect the Downspout Diverter
Mark a cut line on your downspout at the height where the diverter inlet will sit — this needs to be above the top of your barrel. Use a hacksaw to cut the downspout at that line. Fit the diverter into the gap according to the manufacturer’s instructions, then run the flexible diverter hose from the outlet into the barrel’s inlet opening.
Most diverters include a built-in overflow return that sends water back down the lower section of downspout once the barrel is full. Make sure that lower downspout section is still in place and directing water at least three feet away from your foundation. A diverter without a proper overflow path is one of the most common setup mistakes people make.
The whole installation typically takes 20 to 30 minutes. You don’t need plumbing experience — just basic comfort with measuring and cutting. The Amerimax Home Products Flex-A-Spout Downspout Diverter is one of the most widely used options and fits standard 2×3 inch and 3×4 inch downspouts without modification.
Quick Diverter Installation Checklist:
✓ Measure barrel height + 2 inches to find your cut line on the downspout
✓ Cut cleanly with a hacksaw — no jagged edges that could restrict flow
✓ Attach diverter firmly so it doesn’t shift during heavy rainfall
✓ Connect flexible hose from diverter outlet to barrel inlet
✓ Confirm lower downspout section directs overflow away from the foundation
✓ Test with a garden hose before the next rain event
Once connected, run a garden hose into the top of your downspout briefly to test the flow. Watch that water enters the barrel cleanly, that the diverter seals without leaking, and that overflow exits correctly. Fix any issues now rather than during a heavy rainstorm.
4. Attach a Spigot and Overflow Hose
Most purpose-built rain barrels come with a spigot pre-installed near the base. If you’re using a repurposed food-grade barrel or IBC tote, you’ll drill a hole and install a brass or PVC bulkhead fitting with a spigot. Position it 2 to 3 inches above the base — not at the very bottom — so sediment that settles won’t clog the outlet. Connect a standard garden hose directly to the spigot, or use it to fill watering cans. For the overflow port, attach a length of flexible hose and route it to a garden bed, a secondary barrel, or away from the house entirely.
5. Cover the Top to Keep Out Mosquitoes and Debris
A tight-fitting lid with a fine mesh screen over the inlet is essential. Aedes mosquitoes — the species responsible for transmitting dengue and Zika — can complete their breeding cycle in as little as seven days in standing water. A 200-micron or finer mesh screen over every opening eliminates that risk entirely. If your barrel lid isn’t airtight, use a bungee cord or weight to hold it down during windstorms. Dark-colored barrels also help by blocking sunlight that would otherwise encourage algae growth inside the tank.
Scaling Up: Collecting More Rainwater With Larger Systems
A single 55-gallon barrel fills up fast. One inch of rain falling on just 500 square feet of roof generates roughly 300 gallons of runoff. That means your barrel is full and overflowing after about 10 minutes of moderate rainfall. If you’re serious about reducing your dependence on municipal water — or you’re irrigating anything larger than a small garden bed — scaling up is the natural next step. Consider how many systems your home relies on every day and how rainwater collection can be a part of that.
The good news is that scaling doesn’t require starting over. Your existing barrel and diverter become the foundation of a larger network. You add capacity incrementally, connecting barrels in series or swapping to a larger tank when you’re ready.
How far you scale depends on what you’re trying to accomplish. Watering a vegetable garden through a dry summer might require 500 to 1,000 gallons of storage. Supplementing household non-potable water use — toilet flushing, laundry, outdoor washing — pushes that requirement higher. The calculation is straightforward once you know your roof area and average local rainfall.
Linking Multiple Barrels Together
Connecting two or more barrels is done with a simple overflow linking kit — a short length of hose with fittings that connects the overflow port of one barrel to the inlet of the next. Water fills the first barrel completely before flowing into the second, then the third, and so on. Four standard 55-gallon barrels linked this way give you 220 gallons of storage for a total cost that’s still well under $300 if you source food-grade barrels from local suppliers or online marketplaces. Position each barrel at the same height so the system fills evenly and doesn’t stress the connections.
Using 275-Gallon IBC Totes for Serious Storage
An IBC tote is a heavy-duty plastic tank inside a metal cage, originally used to transport food-grade liquids commercially. They hold 275 to 330 gallons and can be found used for $100 to $200 through local classified listings, farm supply stores, or industrial suppliers. One IBC tote replaces five standard rain barrels at a fraction of the combined cost. The built-in 2-inch bottom valve threads directly onto standard garden hose fittings with an adapter. The main trade-off is size — these units are large and need dedicated space, but if you have the room, they’re one of the best value-per-gallon storage options available.
The Best Ways to Use Collected Rainwater Around Your Home
Collecting water is only half the picture. Putting it to consistent use is what makes the system worthwhile — and there are far more applications around a typical home than most people initially realize.
Garden Irrigation and Vegetable Beds
This is where harvested rainwater delivers the most immediate, visible benefit. Rainwater’s natural slight acidity (typically pH 5.6 to 6.5) aligns closely with what most vegetable crops prefer, and without chlorine or chloramines, it doesn’t disrupt the beneficial microbial life in your soil. Connect a soaker hose directly to your barrel spigot and run it along your garden rows for slow, deep watering that reaches roots without surface evaporation. Tomatoes, peppers, leafy greens, and herbs all respond noticeably well to rainwater irrigation compared to treated tap water.
Watering Potted Plants and Outdoor Planters
Container plants are especially sensitive to the mineral buildup that tap water leaves behind — you’ll often see white crusty deposits on the soil surface and pot edges. Switching to harvested rainwater eliminates this problem and reduces how often you need to flush containers to clear salt accumulation. Keep a filled watering can near your barrel so it’s always ready. Consistent use here alone can save hundreds of gallons per season for someone with a moderate number of outdoor containers. For more sustainable practices, consider building a food system at home.
Washing Cars, Decks, and Outdoor Furniture
Soft rainwater is genuinely better for washing surfaces than hard tap water because it rinses cleanly without leaving mineral spots or streaks. Fill a bucket directly from the barrel spigot for hand-washing a car, or connect a hose to scrub down a deck or patio. For light cleaning tasks like rinsing garden tools, boots, or outdoor furniture cushions, the barrel becomes an incredibly convenient self-contained washing station right in your backyard. To ensure you are prepared for all weather conditions, check out our guide on storm readiness.
One full 55-gallon barrel is enough to hand-wash an average-sized car twice over, with water left to spare. When you frame it that way, the value of even a single barrel becomes obvious very quickly.
Filling Birdbaths, Pollinator Stations, and Small Ponds
Wildlife in your yard benefits directly from a reliable clean water source, especially during dry summer months when natural water becomes scarce. Filling a birdbath from your rain barrel takes seconds and keeps it topped off without running a hose. Bees, butterflies, and other pollinators need shallow water sources too — a simple dish filled with pebbles and an inch of harvested rainwater placed near flowering plants creates an instant pollinator station that costs nothing to maintain.
Rainwater Wildlife Station Ideas:
✓ Birdbath — refill every 2 to 3 days to prevent stagnation and mosquito breeding
✓ Pollinator dish — shallow plate with pebbles so bees can land safely without drowning
✓ Small garden pond — top off with rainwater to replace evaporation loss without adding chlorine
✓ Hedgehog or ground bird station — low-sided dish at ground level, refreshed every 48 hours
✓ Butterfly puddling station — wet sand or mud patch kept moist with rainwater for minerals
Small garden ponds lose water steadily to evaporation, especially in summer heat. Topping them off with chlorinated tap water adds chemicals that stress fish, frogs, and aquatic plants over time. Harvested rainwater is the natural equivalent of what those ecosystems actually evolved with, and using it for pond top-offs is one of the most ecologically sound ways to put your stored water to work.
If you’re maintaining a larger water feature, the volume math works strongly in your favor. A 275-gallon IBC tote can top off a medium-sized garden pond through most of a dry season without needing a single drop of municipal water. That’s a meaningful win both for your water bill and for the health of the ecosystem you’re supporting.
Flushing Toilets and Other Non-Potable Indoor Uses
Toilet flushing accounts for roughly 24 percent of indoor household water use in a typical American home, according to the EPA. None of that water needs to be drinking quality. If your home setup allows for it — either through a separate non-potable plumbing line or a manual bucket-flush system — harvested rainwater handles this task perfectly. A dual-plumbing system that feeds toilets from a rainwater tank is a more advanced installation, but even manually carrying a filled bucket to flush a toilet saves real water volume over time. For more insights on home systems, check out how many systems your home relies on every day.
Beyond toilets, collected rainwater works well for mopping floors, washing laundry (with appropriate filtration for machine use), and rinsing recyclables before they go into the bin. These are simple indoor applications that don’t require any infrastructure changes and add up to meaningful conservation when practiced consistently.
Is It Legal to Collect Rainwater Where You Live
Rainwater harvesting is legal in the vast majority of U.S. states, and outright bans are rare and increasingly being repealed. Some states — including Texas, Ohio, and Rhode Island — actively incentivize it with tax credits or rebate programs. A small number of states previously restricted collection due to water rights laws (particularly in the arid West), but most have since loosened those rules significantly. Colorado, for example, now allows residential collection of up to 110 gallons. Before installing any system, a quick check of your state’s current water collection statutes takes five minutes and confirms exactly where you stand. In most cases, you’ll find there’s nothing stopping you from starting today.
How Much Rainwater Can You Realistically Collect
The standard formula used by water harvesting professionals is straightforward: 1 inch of rainfall on 1,000 square feet of roof area yields approximately 600 gallons of collectible water (accounting for a 10 percent loss to evaporation and spillage). A modest 1,500 square foot roof receiving just half an inch of rain generates around 450 gallons of runoff in a single storm event. That puts the potential of even a small residential setup into sharp perspective.
To calculate your own collection potential, multiply your roof’s square footage by 0.623 (gallons per square foot per inch of rain), then multiply by your local average monthly rainfall in inches. Cross-reference that against your local historical rainfall averages, which are freely available through the NOAA Climate Data Online tool, and you’ll have a clear picture of how much water your property can realistically capture across an entire season. Most homeowners are genuinely surprised by how large that number turns out to be.
Start Small and Build From There
The biggest mistake people make with rainwater harvesting is waiting until they can do it perfectly before doing it at all. A single 55-gallon barrel connected to one downspout is a complete, functional, immediately useful system. It costs under $100, installs in an afternoon, and starts delivering free water the next time it rains. That first barrel teaches you more about your property’s water dynamics — how fast it fills, where you use water most, what you’d want more capacity for — than any amount of planning ever could.
From there, every addition is driven by real experience rather than guesswork. You add a second barrel when the first one fills too fast. You upgrade to an IBC tote when you outgrow the barrels. You add a first-flush diverter when you decide to refine water quality. The system grows with you, and the learning curve at each stage is minimal because the fundamentals never change. Start with what you have, collect what falls on your roof, and use every drop intentionally. That’s the whole practice.
Frequently Asked Questions
Here are the most common questions people have when they’re getting started with rainwater harvesting at home.
Is collected rainwater safe to use on edible plants?
Yes, rainwater collected from a standard residential roof is safe to use on edible plants in the vast majority of situations. The primary concern with roof-collected water is surface contamination — bird droppings, decomposing leaves, and trace compounds from roofing materials. For vegetable gardens, applying water at the base of the plant rather than overhead (through drip irrigation or a soaker hose) keeps harvested water off edible portions entirely and eliminates any practical risk.
A first-flush diverter that discards the initial flow from each rain event removes the highest-concentration contaminants automatically, leaving cleaner water for storage. For root vegetables and leafy greens grown in direct soil contact, this combination of base watering and first-flush diversion is more than sufficient for safe, healthy food production.
How do I stop mosquitoes from breeding in my rain barrel?
Keep every opening on your barrel covered with fine mesh screen (200 microns or finer), ensure the lid fits tightly with no gaps, and add a mosquito dunk — a Bacillus thuringiensis israelensis (Bti) tablet — to the barrel if you notice any standing water concern. Bti is a naturally occurring soil bacterium that kills mosquito larvae without harming plants, pets, birds, or beneficial insects. One dunk lasts up to 30 days and costs less than $2. Proper screening alone prevents the problem entirely in a well-sealed barrel.
Can I drink rainwater collected from my roof?
Rainwater collected from a typical residential roof is not safe to drink without filtration and purification. Asphalt shingles, metal flashing, and gutter materials can leach compounds into the water, and bird droppings introduce biological contamination. However, with a proper multi-stage filtration system — a quality gravity filter like a Berkey with Black Berkey purification elements effectively removes bacteria, heavy metals, and chemical contaminants — roof-harvested rainwater can be made safe for drinking. This is a higher-level application that requires deliberate filtration infrastructure, but it is absolutely achievable for those committed to water independence.
How much does a basic rain barrel setup cost?
A functional single-barrel setup costs between $30 and $150 depending on the barrel source and accessories. A repurposed food-grade 55-gallon drum sourced locally runs $20 to $40. A purpose-built rain barrel like the Step2 Fernway Rain Barrel retails around $100 to $120 and includes a pre-installed spigot, overflow outlet, and debris screen. Add a downspout diverter ($15 to $30), a cinder block platform ($5 to $10), and overflow hose ($5 to $10) and your total for a complete, ready-to-use system lands well under $200. For more on home systems, you might consider how many systems your home relies on every day.
Scaling up to a linked four-barrel system using reclaimed food-grade barrels pushes the total to roughly $150 to $250 for 220 gallons of storage — still less than many people spend monthly on water bills. A single used 275-gallon IBC tote with basic fittings comes in at $120 to $220 and offers the best cost-per-gallon of any storage option at the residential scale.
What is the best roof material for collecting rainwater?
Metal roofing — particularly standing seam steel or aluminum — is the gold standard for rainwater collection. It’s non-porous, doesn’t shed granules or chemical compounds, resists biological growth, and produces consistently clean runoff. Unpainted or food-safe coated metal roofs are ideal for systems where water quality is a priority, including those intended for eventual drinking use after filtration.
Clay and concrete tile roofs are an excellent second choice. They’re chemically inert once cured, don’t leach compounds into runoff, and have smooth surfaces that shed debris efficiently. Rainwater collected from tile roofs is reliably clean for garden irrigation and most non-potable uses without any additional treatment.
Asphalt shingle roofs — the most common residential roofing material in North America — are acceptable for garden irrigation and outdoor use but are not recommended as a source for drinking water even with filtration. Asphalt shingles contain petroleum-based compounds and fiberglass binders that can leach trace chemicals into runoff, particularly from newer roofs. The concern diminishes over time as shingles weather, but metal or tile remains the cleaner choice wherever options exist. For more information on preparing for severe weather, check out our guide on storm readiness.
Whatever your roof material, the consistent best practice is to install a first-flush diverter, keep gutters clean and free of decomposing organic matter, and use a fine mesh screen at every barrel inlet. Good system hygiene matters far more than roof material for the vast majority of rainwater end uses around the home.




Leave a Reply