
Article At A Glance:
- Knowing DRSABCD gives you a reliable step-by-step framework to follow in almost any emergency situation before help arrives.
- CPR and AED use are the two skills most likely to directly save a life during cardiac arrest — every second counts.
- Bleeding control, burns, and choking responses are common emergencies where fast, correct action makes a measurable difference.
- Reading about first aid is not enough — hands-on training is what builds the muscle memory you actually need in a crisis.
- Keep reading to find out which of these skills is the easiest to learn but the most overlooked in standard training.
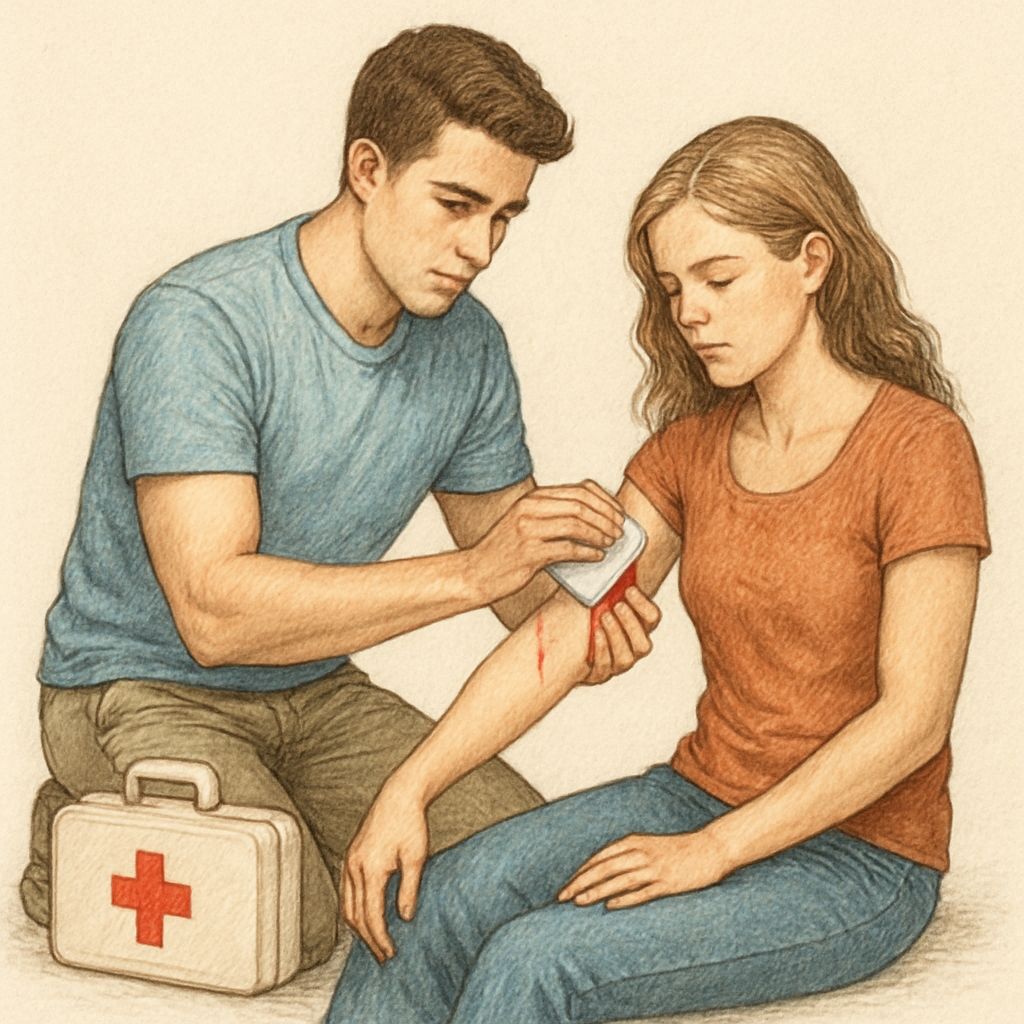
These Skills Could Save a Life Today
Most emergencies don’t announce themselves — they happen fast, and the person nearest to the victim is usually an ordinary bystander with no medical background.
That gap between when something goes wrong and when paramedics arrive is where basic medical knowledge matters most. In Australia, ambulance response times average around 8 to 14 minutes depending on location. A person in cardiac arrest can sustain permanent brain damage in as little as four to six minutes without CPR. The math is unforgiving, but it’s also a clear argument for why these skills belong to everyone, not just healthcare workers and first responders.
1. DRSABCD: The Framework That Guides Emergency Response
Panic is the enemy of effective first aid. DRSABCD exists specifically to cut through that panic and give you a sequence to follow when your brain wants to freeze. It’s the foundation that every other skill in this article builds on.
Before you touch anyone or do anything else, this framework tells you exactly where to start and what order to move through. That structure is what separates a useful bystander from one who makes things worse. To ensure you are prepared for such situations, remember that self-reliance matters and it can enhance your ability to respond effectively.
What Each Step of DRSABCD Means
Each letter in DRSABCD represents a specific action in order of priority:
- D — Danger: Check the scene for hazards to yourself, bystanders, and the patient. Do not approach if it isn’t safe.
- R — Response: Check if the patient is conscious by calling their name and squeezing their shoulder firmly.
- S — Send for Help: Call 911 (or direct someone specific to call) as soon as you confirm unresponsiveness.
- A — Airway: Tilt the head back gently and lift the chin to open and clear the airway.
- B — Breathing: Look, listen, and feel for normal breathing for no more than 10 seconds.
- C — CPR: If not breathing normally, begin CPR immediately — 30 compressions to 2 rescue breaths.
- D — Defibrillation: Apply an AED as soon as one is available and follow its voice prompts.
Why Following the Sequence Matters
Skipping steps costs lives. Rushing to start CPR without checking for danger can put you in harm’s way. Starting compressions on someone who is actually breathing normally can cause serious injury. The sequence isn’t bureaucratic — it’s built around what the body needs and what the responder needs to know first. Practice it until it’s automatic, because under stress, you will revert to what’s been drilled in, not what you’ve only read once.
2. CPR: The Skill With the Highest Stakes
Cardiopulmonary resuscitation keeps oxygenated blood moving to the brain and vital organs when the heart has stopped doing that job. It does not restart the heart — that’s the AED’s role — but it buys critical time until a defibrillator arrives or paramedics take over.
How to Perform Chest Compressions Correctly
Position matters more than most people expect. Place the heel of one hand on the center of the chest — directly on the lower half of the sternum — and interlace the other hand on top. Keep your arms straight, shoulders directly over your hands, and compress down at least 5 to 6 centimeters at a rate of 100 to 120 compressions per minute. That rate is roughly the tempo of Stayin’ Alive by the Bee Gees, which is genuinely useful to keep in mind under pressure.
Allow the chest to fully recoil between each compression. Incomplete recoil reduces blood flow on the next compression, which defeats the purpose. Don’t lean on the chest between pushes — lift your weight fully each time. For more detailed guidance on emergency techniques, explore this basic medical knowledge everyone should know.
When to Add Rescue Breaths
If you are trained and willing, the standard ratio is 30 compressions followed by 2 rescue breaths. Tilt the head, lift the chin, pinch the nose closed, form a seal over the mouth, and deliver each breath over approximately one second — just enough to see the chest rise. If you are not trained in rescue breaths or are uncomfortable performing them, continuous hands-only CPR at 100 to 120 compressions per minute is still significantly better than doing nothing. Ensuring your home is equipped with the most important safety items can also be crucial in emergency situations.
How Long to Keep Going
Continue CPR without stopping until the person starts breathing normally, a defibrillator is attached and ready to analyze, trained medical help takes over, or you are physically unable to continue. Fatigue sets in quickly — if there are other bystanders, rotate every two minutes to maintain compression quality.
3. How to Use an AED
An automated external defibrillator (AED) is designed to be used by anyone, regardless of medical background. The device analyses the heart rhythm itself and only delivers a shock if one is needed — you cannot accidentally shock someone who doesn’t need it.
What an AED Actually Does to the Heart
During cardiac arrest, the heart often falls into a chaotic rhythm called ventricular fibrillation, where the electrical signals misfiring prevent the heart from pumping effectively. An AED delivers a controlled electrical shock that momentarily stops all electrical activity in the heart, giving it the chance to reset into a normal rhythm. Without defibrillation, the chances of surviving ventricular fibrillation drop by roughly 10% for every minute that passes.
Step-by-Step: Using an AED on a Collapsed Person
Turn the AED on as soon as it’s in your hands — most units power on the moment you open the lid. From there, follow the voice prompts exactly. They are designed to be clear and calm, even for someone who has never touched a defibrillator before. The general sequence is crucial for home safety and emergency preparedness in public.
- Power on the AED by opening the lid or pressing the power button.
- Expose the person’s chest and ensure the skin is dry.
- Attach the adhesive pads exactly as shown in the diagram on the pads themselves — one below the right collarbone, one on the lower left side of the chest.
- Ensure nobody is touching the patient and press Analyze when prompted.
- If a shock is advised, make sure no one is touching the patient and press the Shock button.
- Resume CPR immediately after the shock and continue until the AED prompts another analysis.
4. Controlling Bleeding and Wound Care
Severe bleeding can become life-threatening within minutes. A large wound to a major blood vessel can cause a person to lose consciousness from blood loss in under two minutes. Knowing how to act immediately — before an ambulance arrives — can be the difference between a serious injury and a fatal one.
How to Apply Effective Pressure
Use the cleanest material available — a sterile dressing is ideal, but a folded cloth, clothing, or even a bare hand will do when nothing else is at hand. Press firmly and directly over the wound and hold that pressure without lifting or checking. Releasing pressure, even briefly to check the wound, disrupts clot formation and restarts the bleeding process. For more on essential safety measures, check out the most important safety items every home should have.
If blood soaks through the dressing, do not remove it. Add more material on top and press harder. Keep applying firm, continuous pressure until emergency services arrive. For limb wounds where direct pressure isn’t controlling the bleed, a tourniquet applied 5 to 7 centimeters above the wound is appropriate — note the time it was applied and do not remove it.
When a Wound Needs More Than a Bandage
Not every cut needs a trip to the emergency department, but some signs make it non-negotiable. Seek immediate medical attention if the wound is deep enough to see fat, muscle, or bone; if it won’t stop bleeding after 10 minutes of continuous pressure; if it’s a puncture wound to the chest, abdomen, or neck; or if it was caused by a dirty or rusty object and the person hasn’t had a tetanus booster in the last five years.
5. Responding to Choking
Choking cuts off the airway completely or partially and can cause unconsciousness within minutes if the obstruction isn’t cleared. Acting fast and acting correctly are both essential — the wrong technique wastes precious seconds. For more information on why these life-saving skills are crucial, explore our detailed guide.
Signs Someone Is Choking vs. Coughing
A person who is coughing forcefully is moving air — their airway is partially open, and their body is doing the right thing. Encourage them to keep coughing and stay close to monitor. A person who is choking, however, will often clutch their throat with one or both hands, be unable to speak or cry out, make high-pitched squeaking sounds or no sound at all, and rapidly turn red then blue in the face. If they cannot breathe, speak, or cough effectively, it is time to act immediately.
Back Blows and Abdominal Thrusts: The Right Order
In Australia, the recommended sequence for a conscious choking adult starts with five firm back blows. Lean the person forward, support their chest with one hand, and use the heel of your other hand to deliver five sharp blows between the shoulder blades. The forward lean is critical — it uses gravity to help dislodge the object downward rather than further into the airway.
If five back blows don’t clear the obstruction, move immediately to five abdominal thrusts. Stand behind the person, place one foot forward for stability, make a fist with one hand and position it just above the navel and well below the breastbone, cover it with your other hand, and pull sharply inward and upward. Alternate between five back blows and five abdominal thrusts until the object is expelled or the person loses consciousness.
Choking Response for Infants vs. Adults
Never perform abdominal thrusts on an infant under 12 months. Instead, hold the baby face-down along your forearm with their head lower than their chest and deliver five firm back blows between the shoulder blades using two fingers. Then turn the infant face-up and deliver five chest thrusts using two fingers on the center of the chest, just below the nipple line. Repeat the cycle and call 000 immediately.
For children over 12 months, use the adult technique but scale the force appropriately. The principle is the same — alternate back blows and abdominal thrusts — but you’ll need to kneel or crouch to position yourself properly behind a small child.
6. Burn First Aid
Burns are one of the most common household emergencies, and they’re also one of the most commonly mismanaged. The instinct to reach for butter, toothpaste, or ice is deeply ingrained in many people — and all three cause active harm.
The tissue damage from a burn continues even after the heat source is removed, because the skin retains heat. The goal in the first minutes is to stop that ongoing damage as quickly as possible, and there is only one evidence-based way to do it.
The Cool Running Water Rule and Why Ice Makes It Worse
Cool the burn under gently running water for a full 20 minutes. Not cold water, not iced water — cool running tap water at around 15°C. This duration isn’t a suggestion — research consistently shows that less than 20 minutes is significantly less effective at reducing burn depth. Start the 20-minute clock from the moment water contacts the burn, not from when the burn occurred.
Ice causes vasoconstriction — it dramatically narrows blood vessels in the burned tissue, cutting off circulation to an area that is already injured. This accelerates tissue death rather than preventing it. It also risks frostbite on skin that is already compromised. Ice feels intuitive but causes measurable harm. Cool running water is the only appropriate first response. For more on practical self-defense and everyday protection, consider learning about everyday carry (EDC) essentials.
How to Tell a Minor Burn From a Serious One
Superficial burns — previously called first-degree burns — affect only the outer layer of skin. They appear red, dry, and painful, similar to mild sunburn, and generally heal without medical treatment beyond cooling and covering. A superficial partial-thickness burn goes deeper, producing redness, swelling, and blisters, and while it may still heal at home with proper wound care, it warrants medical review if the blisters break or the area is large.
Seek emergency medical care for any burn that covers a large area of the body, involves the face, hands, feet, genitals, or major joints, appears white, brown, or black and is painless (indicating deep tissue damage), or is caused by chemicals or electricity. Chemical and electrical burns in particular require emergency assessment regardless of how they look on the surface.
7. Recognizing a Heart Attack or Stroke
Both heart attacks and strokes are time-critical medical emergencies where every minute of delay increases the permanent damage done to the body. The challenge is that neither always looks the way people expect — and that gap between what people think these emergencies look like and what they actually look like costs lives every year.
Heart Attack Warning Signs That Are Easy to Miss
The classic Hollywood presentation — sudden, dramatic chest-clutching pain — does happen, but it’s far from the only way a heart attack announces itself. Many people experience a dull, heavy pressure or tightness in the chest rather than sharp pain. That discomfort can radiate to the left arm, jaw, neck, back, or even the stomach, and it can come and go rather than staying constant.
What makes heart attacks genuinely dangerous to recognize is the accompanying symptoms that seem unrelated: sudden cold sweats, nausea, shortness of breath, lightheadedness, or an overwhelming sense of dread. Women in particular are more likely to experience heart attacks without prominent chest pain, presenting instead with fatigue, nausea, and jaw or back discomfort. If something feels wrong — even if it doesn’t feel like what you’ve been told a heart attack feels like — call 000 immediately. Do not drive yourself to the hospital. Understanding these symptoms is part of being self-reliant and prepared for emergencies.
The FAST Test for Stroke Recognition
Stroke recognition comes down to four checks you can do in under 30 seconds. The FAST acronym makes it straightforward to remember under pressure:
- F — Face: Ask the person to smile. Is one side of the face drooping or uneven?
- A — Arms: Ask them to raise both arms. Does one drift downward or feel weak?
- S — Speech: Ask them to repeat a simple sentence. Is their speech slurred, confused, or impossible?
- T — Time: If any of the above are present, call 000 immediately. Note the exact time symptoms began — this is critical information for the medical team.
Stroke treatment, particularly clot-dissolving medication, has a narrow treatment window — often as little as 4.5 hours from symptom onset. The sooner emergency services are called, the more of the brain can be saved. Other stroke signs include sudden severe headache with no obvious cause, sudden vision loss in one or both eyes, and unexplained loss of balance or coordination.
Why Hands-On Training Beats Reading About It
Reading about CPR is genuinely useful. Understanding the theory of back blows and abdominal thrusts, knowing why ice damages a burn, understanding the FAST test — that knowledge has real value. But there is a significant and measurable gap between knowing what to do and being able to do it correctly under stress on an actual person.
Chest compressions are a good example. Most people significantly underestimate how hard 5 to 6 centimeters of compression depth actually feels. They also don’t anticipate the physical effort required to sustain 100 to 120 compressions per minute over several minutes without the quality dropping. The only way to calibrate that is to practice on a manikin with a trainer watching and correcting your hand position, your depth, and your rate in real time. The same applies to rescue breaths, applying an AED, delivering back blows with the right force, and cooling a burn while simultaneously calling for help.
A formal first aid course typically takes four to eight hours and covers all the skills in this article with hands-on practice built in. These certificates are valid for three years, with CPR component refreshers recommended annually. The confidence that comes from that training is qualitatively different from reading confidence — it’s the kind that holds up when something is actually going wrong in front of you. For additional safety measures, consider learning about the most important safety items every home should have.
Frequently Asked Questions
These are the questions that come up most often from people who are new to first aid or considering formalizing their skills through a course.
What Is the Single Most Important First Aid Skill to Learn?
CPR is the skill with the highest direct impact on survival outcomes in the most immediately life-threatening emergency — cardiac arrest. The ability to keep oxygenated blood moving to the brain while waiting for a defibrillator or paramedics can be the entire difference between survival and death, or between full recovery and permanent brain damage.
That said, DRSABCD is what makes every other skill work properly. Without the framework to assess the scene, get help on the way, and address the airway before anything else, even correct CPR technique gets applied in the wrong sequence. Learning both together — which any CPR or first aid course will deliver — gives you a genuinely functional emergency response capability rather than an isolated technique.
Do I Need a Certificate to Perform First Aid?
No certificate is required to perform first aid as a bystander. In most places, Good Samaritan laws protect people who act in good faith during an emergency, even if their first aid is imperfect. However, certain workplaces are legally required to have a minimum number of certified first aid officers on site, so a formal qualification matters in that context. More practically, the certificate reflects that you’ve actually practiced the skills — which is the real point of getting one.
How Often Should First Aid Skills Be Refreshed?
A nationally recognized first aid certificate should be valid for three years before requiring renewal. However, guidelines recommend refreshing the CPR component annually, because CPR technique is particularly susceptible to drift without regular practice.
Beyond formal renewal timelines, skills fade faster than most people expect. Research on skill retention consistently shows that CPR quality degrades noticeably within three to six months without any practice. Even watching a short refresher video or practicing hand position annually helps maintain readiness between formal courses. For more on maintaining readiness, consider exploring why self-reliance matters.
Can Children Learn First Aid?
Yes — and the earlier, the better. Children as young as eight or nine can learn age-appropriate first aid skills including recognizing emergencies, calling 911, performing basic wound care, and assisting an adult with CPR. Many first aid providers offer junior or school-based programs specifically designed for this age group. Teenagers can typically complete standard adult first aid courses and perform effective CPR, particularly with the hands-only technique which requires less coordination than the full 30:2 method.
What Should Every Home First Aid Kit Contain?
A well-stocked home first aid kit should cover the most common household emergencies: cuts and wounds, burns, sprains, and allergic reactions. At minimum, every kit should include:
- Sterile wound dressings in multiple sizes
- Adhesive bandages (assorted sizes)
- Rolled bandages and conforming gauze
- Triangular bandage and safety pins
- Wound closure strips
- Non-latex disposable gloves (multiple pairs)
- CPR face shield or pocket mask
- Tweezers and scissors
- Instant cold pack
- Saline solution or sterile eyewash
- Thermal emergency blanket
- First aid manual or instruction card
Check your kit every six months and replace anything that has expired or been used. Store it somewhere accessible to all adults in the household but out of reach of young children. A kit that’s buried in a hard-to-reach cupboard is significantly less useful than one near the kitchen or in a clearly labelled location everyone knows about.



Leave a Reply